Project : Infinity CM Stacker (Reservoir In Case)


-
DAE_JA_VOO
- Registered User
- Posts: 12310
- Joined: 28 Nov 2005, 02:00
- Location: That other place
- Contact:
Byron, I just looked at it now. But that's seriously not on man. I mean come on. Just because people don't post, doesn't mean its not read. It gets slightly boring saying, "good work keep it up" after EVERY update. I for one BARELY post in the project logs so when I do, it should be appreciated 
Now be a man and hurry up with the mod
Is your bike sold yet? I am getting an xbox 2mo WOOT
Now be a man and hurry up with the mod
Is your bike sold yet? I am getting an xbox 2mo WOOT
-
Vampyre_2099
- Registered User
- Posts: 1321
- Joined: 04 Nov 2007, 02:00
- Location: /home/jhb/fourways


Doob's don't get upset. Your work is really great. Just remember that. Whether we post or not is not up to you or how well you did the modding in the most recent update. I really like your ideas and skills. It is demotivating to see no one tell you that this is looking good, but Doob's, just live with it. It's going to happen, people forget to post or they look at the update and think wow!!! and move on to the next thread. Check your "views" count as well, that should indicate if your mod is popular or not.
NOW: The door is looking good. When are you going to do the painting of the thing?
NOW: The door is looking good. When are you going to do the painting of the thing?
yeah I have to agree doobs, I look at your updates, but I dont always post. but if you arent going to post here, could you link to the other forum so I can keep up to date  Or just link in your sig
Catch a man a fish, and you can sell it to him. Teach a man to fish, and you ruin a wonderful business opportunity. (Karl Marx)
-
RobThePyro
- Registered User
- Posts: 1210
- Joined: 04 Dec 2006, 02:00
- Location: Durbz!
- Contact:

-
Lithe_Joint
- Registered User
- Posts: 802
- Joined: 06 Sep 2006, 02:00
- Location: WTF?
- Contact:
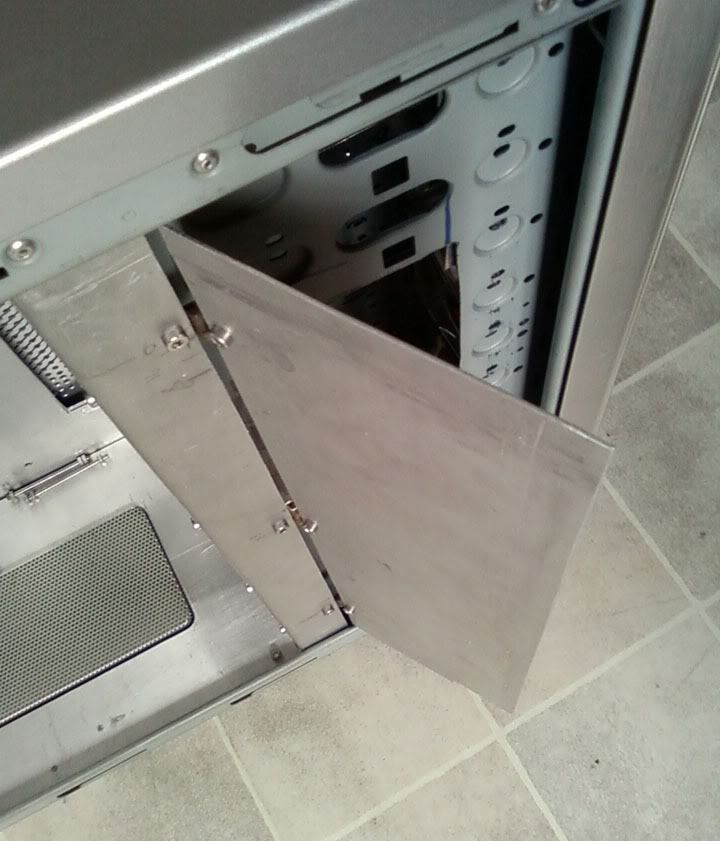
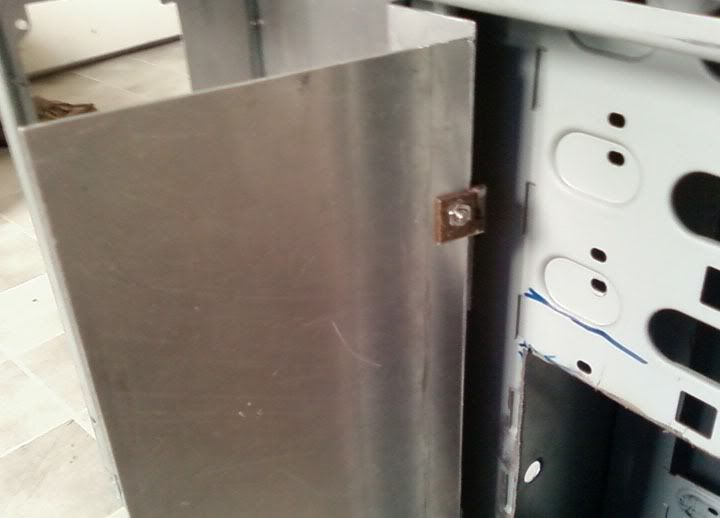
The flange on the end of the tray on most drives can be removed, making the tray narrower. Unless you are talking about the actual width of the slot ie. left to right as opposed to up and down.Lithe_Joint wrote:Nice work on that door. Just a question , though...is the gap wide enough to allow an optical drive's tray to move forward unhindered? It looks a bit narrow
ASUS P5K Delux Wifi || Intel Core 2 Duo 3ghz e6850 || 4gb Mushkin XP 1066mhz DDR2 CL4 || 2x Sapphire ATI HD3870 512mb Crossfire || OCZ StealthXstream 600w || 500gb WD || 2x120gb WD Raid 0 || Thermaltake Xaser III Lanfire || Logitech Z-5500 Digital 5.1 Speakers || Samsung Syncmaster 226BW 22" LCD "S" Panel ||
-
DoOb
- Registered User
- Posts: 2478
- Joined: 02 Aug 2006, 02:00
- Location: Durban, Bluff, Here by the ocean
- Contact:
Orla guys well, ive come to my senses and will and have done some work on my case.
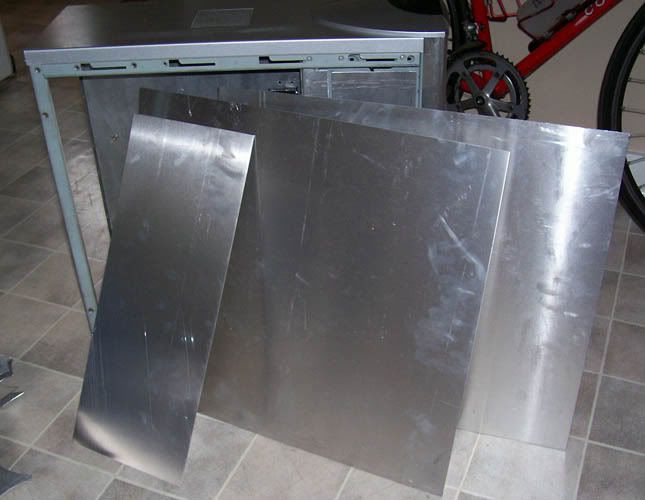
Well actually redoing some panels, coz of my new DFI P35 slots are different so i will have to make a new back plate. Which if you see in the pics ive purchased the aluminum and also got the side panel pieces ready aswell, Im just gonna paste what ive said on Bit Tech coz ive been posting there.
And then today ive watercooled my GFX card two pics as follows
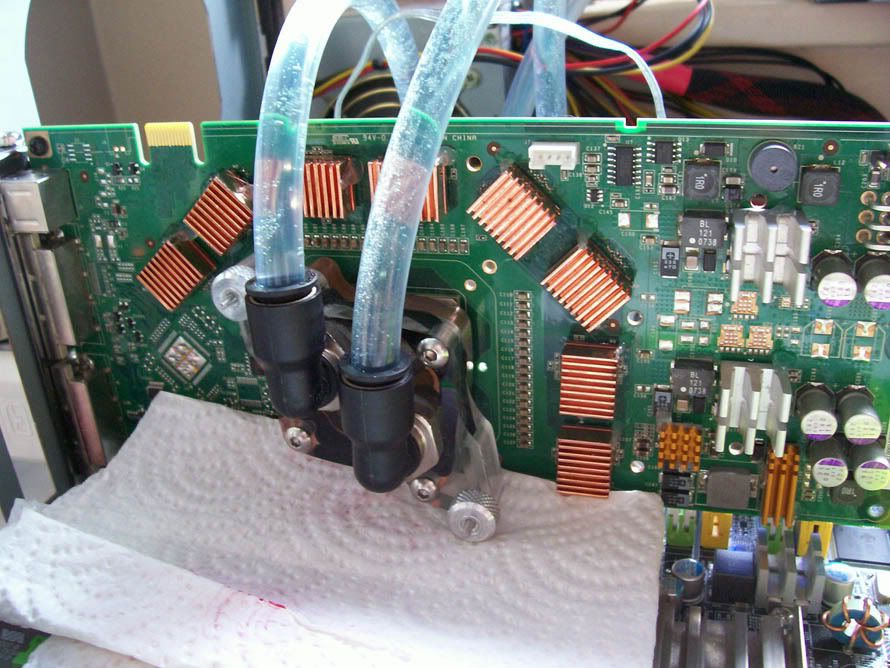
Just some temp carton towel just incase of a leak
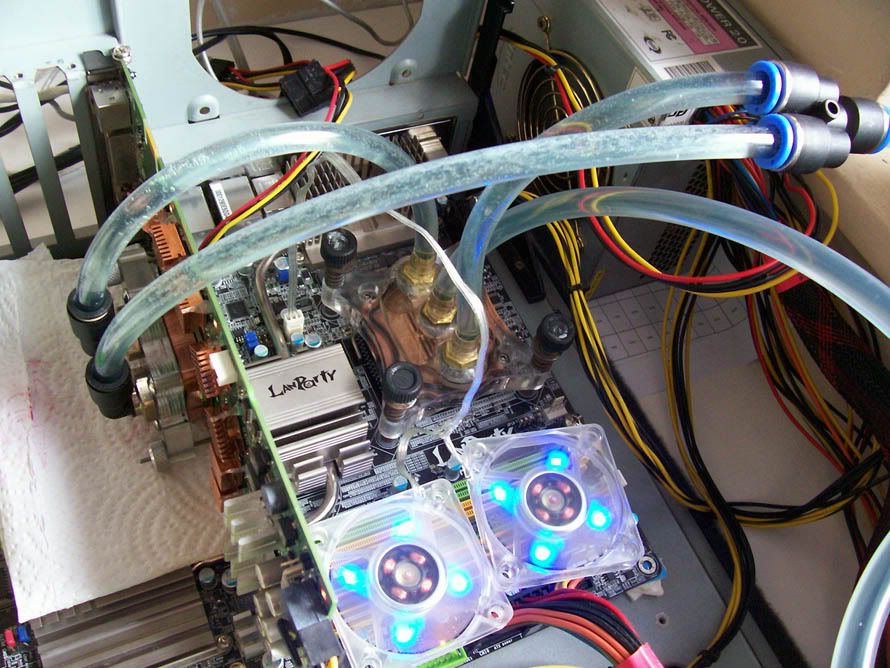
Temperature is 38 on the core at the moment
Yea need Dremel Disks waiting for Fiberoptic to get me, um i dont wanna cut my back panel with a jigsaw either coz it scratches the aluminum.
Until the next update.
DoOb's
Well actually redoing some panels, coz of my new DFI P35 slots are different so i will have to make a new back plate. Which if you see in the pics ive purchased the aluminum and also got the side panel pieces ready aswell, Im just gonna paste what ive said on Bit Tech coz ive been posting there.
Hey guys
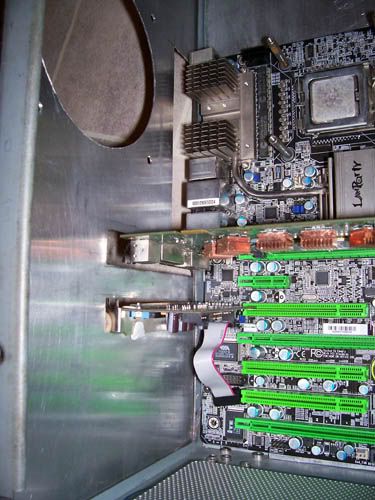
So i got some really bad news... I went to a lan last night. But the day before Thursday, i was putting my pc together into my case so i wouldnt have to take my pc in pieces to the Lan, I came across a problem, which i was aware of.
Ok so after about 3hours of making the other adjustments, i.e GFX card plate quik placement holes and cutting and sound card plate i had my GFX card in the middle slot on the DFI.
Now I in my head had this thing that surely all 3 pci-e slots should be 16x, well that im afraid isnt with the P35 DFI. So now the problem is i finally get my pc all together. Start up COD4 and for some reason my frames are like 17-20 eish a second.
The card was running at 1x. so i go in the bios and now i was able to only put it to 4x NC, this still didnt help with only bringing in another 5 fps.
The bad news.
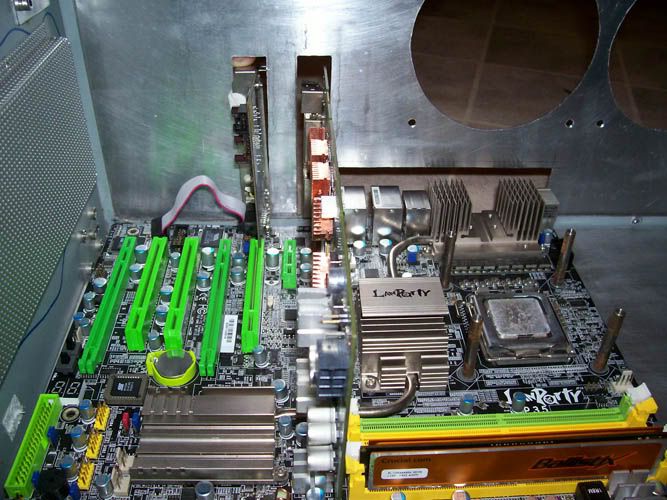
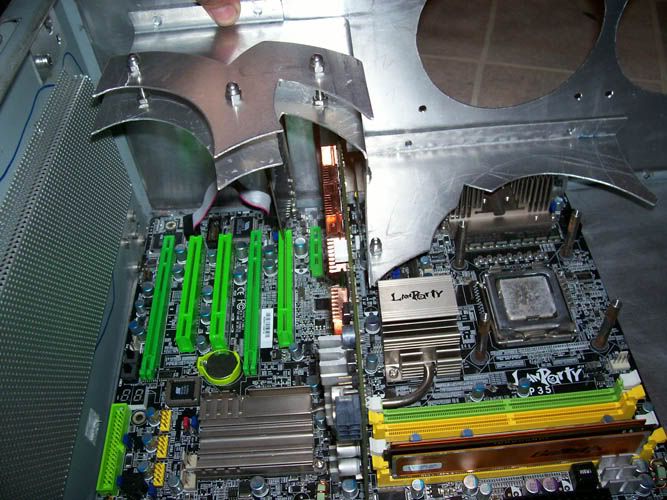
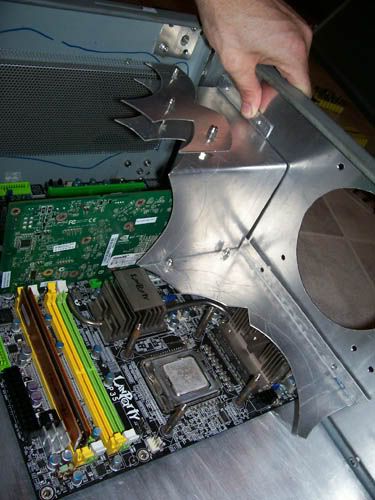
I can either disband this project, or spend alot more time on this case, and remake a new back plate which might be ok for my radiator still. And also remark another new and better motherboard cover. I shoudl still be able to use the cover that bends over the gfx card and follows to the bas of my case.
Coz the problem is my card has to be in the top slot which is the only slot that is 16x. And thats is exactly opposite where my radiator port barb comes out. Bummer. Which in my mind i knew about not knowing about the other slots not being 16x...
I know it would be stupid to just abandom the project so .... my option is tomorrow im gonna look a heighten the radiator with a new back plate.
I ended up going to the lan with me lunging around my pc in pieces, almost killing my PSU from my tubing leeking through the one pushin on my res. and water trickled down my psu fan grill. eish i shate. 5 hours later i made a plan and was gaming at 11pm at night.
Thanks guys, im really sorry about this. Kinda crappy on my hard work on that back plate, but at least ive got a spare for another user motherboard with the pci-e slot one down.
Well guys looks like im modding this weekend, Got my new panels and now i can get on with my mod.
Will design the side panel tomorrow morning.
Yip Yip
Hows it going guys well after a late night of overclocking my new E8400 getting 4.4ghz (489x9) i got down to some measuring up for the new back panel. I havnt designed the side panel window just yet, im gonna do some looking on deviantart.com
Pics as follows.
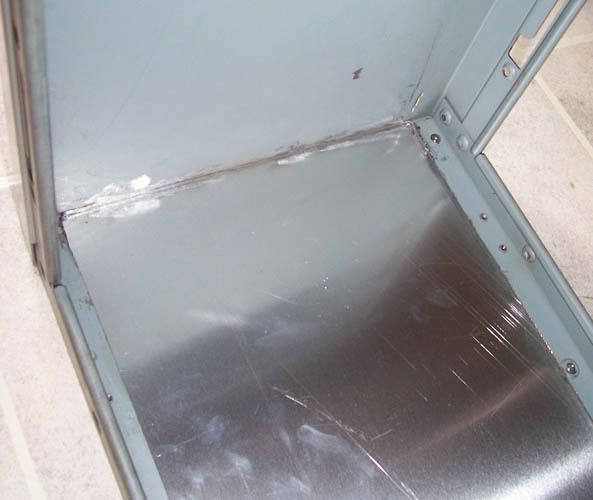
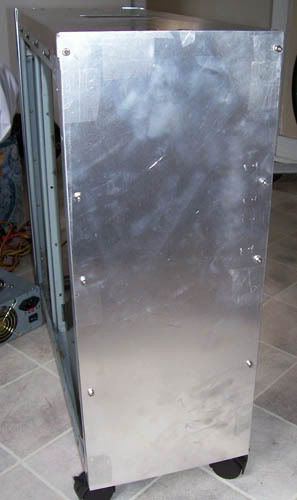
Got the panel all lined up, using sticky tape to hold it in place. You can also see the stacker had a lip to it so i took the angle grinder and cut that off, allowing me about another centimetre of space to push the psu up. So now the PSU will sit right at the very top of the case with not space between the top of the case and the base of the power supply.
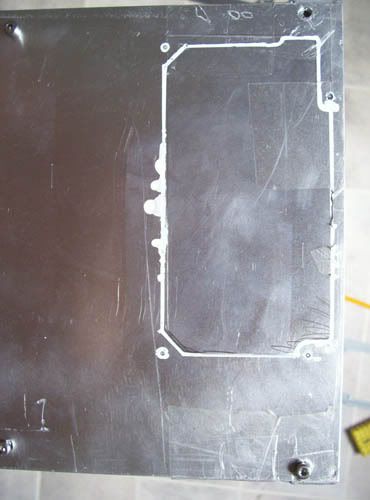
Marked all the holes to be drilled for the panel. And Side panel on.
My Stacker comes with this neat plate that you actually screw onto the PSU and then from there on to the Stacker, so that was my template, aligning it up in the correct position.
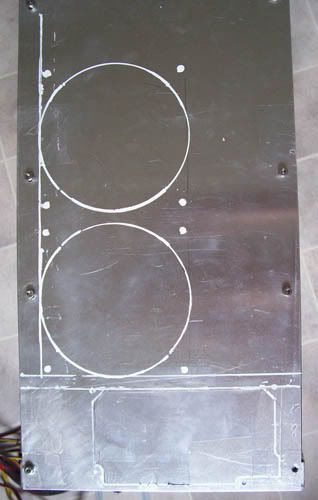
Next was the Radiator, this had to be as high up as possible. Coz of the Gfx card slot being one slot higher.
So there is a 1cm gap between the psu and where the Fans will be mounted inside the case.
Here i just wanna show you the difference in space now, allowing alot more space for the GFX card, and also about 1-2 centimetres of clearance aswell. So this should be good to go.
I gotta purchase dremel disks, i dont want to use a jigsaw to cut the back panel, incase it jerks or something and bends the panel.
So now I must just design the side panel window. and then I am A for a Wave soon.

And then today ive watercooled my GFX card two pics as follows
Just some temp carton towel just incase of a leak
Temperature is 38 on the core at the moment
Yea need Dremel Disks waiting for Fiberoptic to get me, um i dont wanna cut my back panel with a jigsaw either coz it scratches the aluminum.
Until the next update.
DoOb's

-
Lithe_Joint
- Registered User
- Posts: 802
- Joined: 06 Sep 2006, 02:00
- Location: WTF?
- Contact:
-
DoOb
- Registered User
- Posts: 2478
- Joined: 02 Aug 2006, 02:00
- Location: Durban, Bluff, Here by the ocean
- Contact:
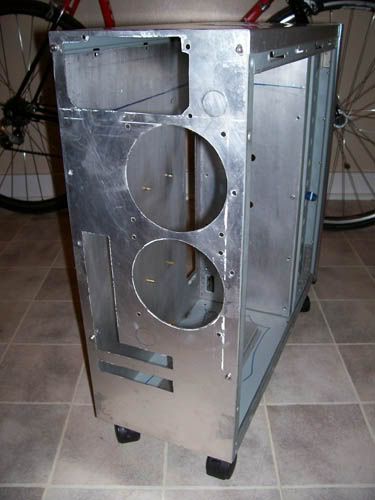
So I've had enuf of waiting to try get disks, so i went ahead and did the holes that are mark so far with my jigsaw, Freak i did a bloody good job i must admit.
Ok i was gonna use masking tape all over but decided rather just layer the jigsaw base with the stuff. I also applied oil on the base of the jigsaw and also on the back panel. So that the jigsaw ran smooth over the bits of aluminum when getting cut.
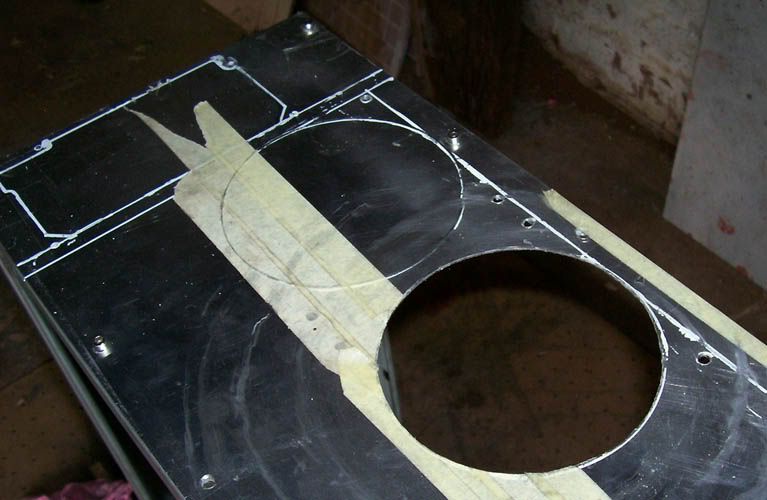
And other shot of the jigsaw with the layered amount of masking tape.
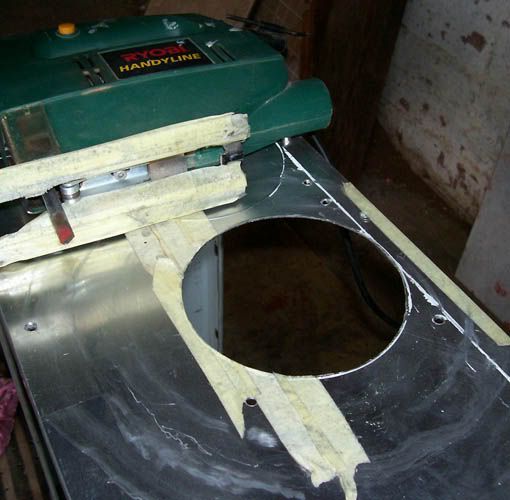
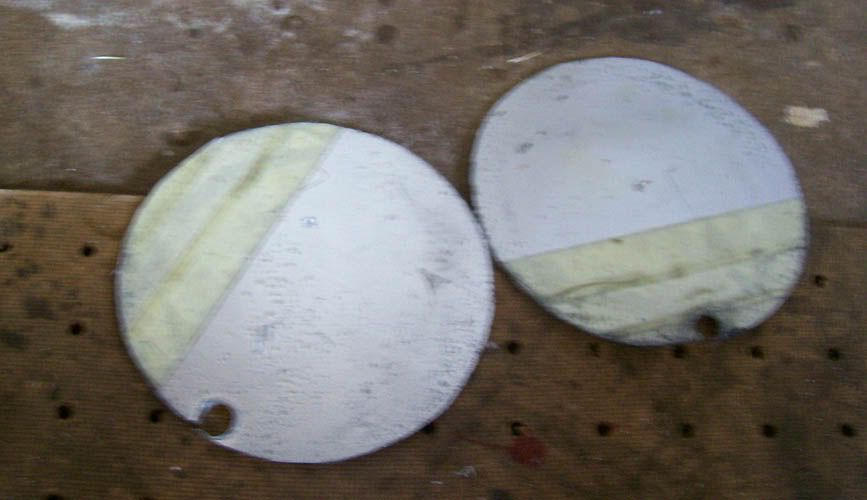
And now when i got just over half way i put a clamp under the one side with a block of wood to stop the off cut circle from flapping the **** out of the panel and bending anything. Afraid i didnt take a pic tho. But here are both holes cut with a jigsaw
Using a starter hole to get the 120mm holes started off course.
Then it was time for the PSU hole. As before when it came to about half way when the off cut started flapping, put the clamp with block of wood under neath to restrict damage to the panel via bending.
And here it is a nicely cut hole
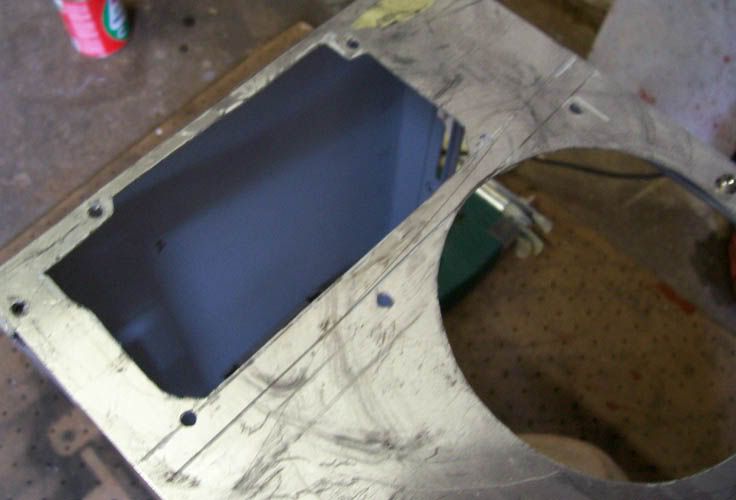
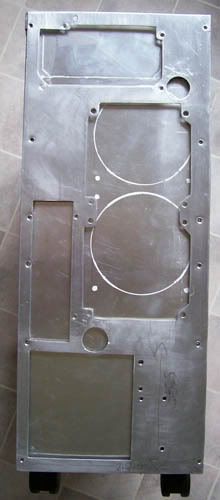
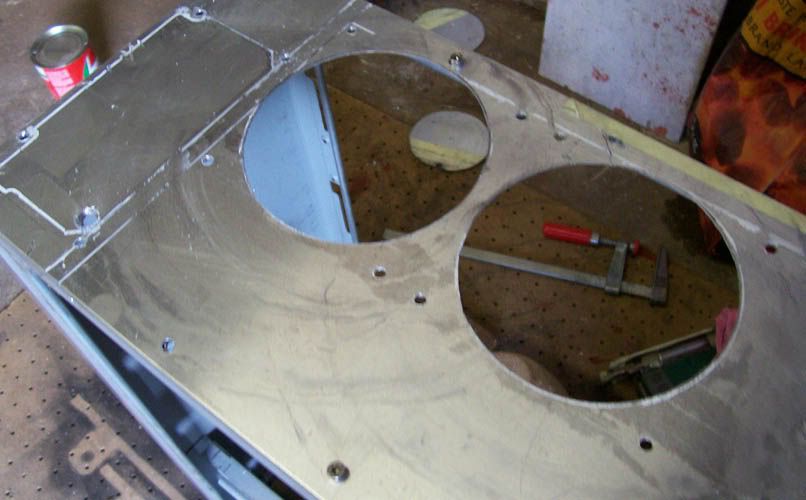
I missed a piece on the left side so here it is finished.
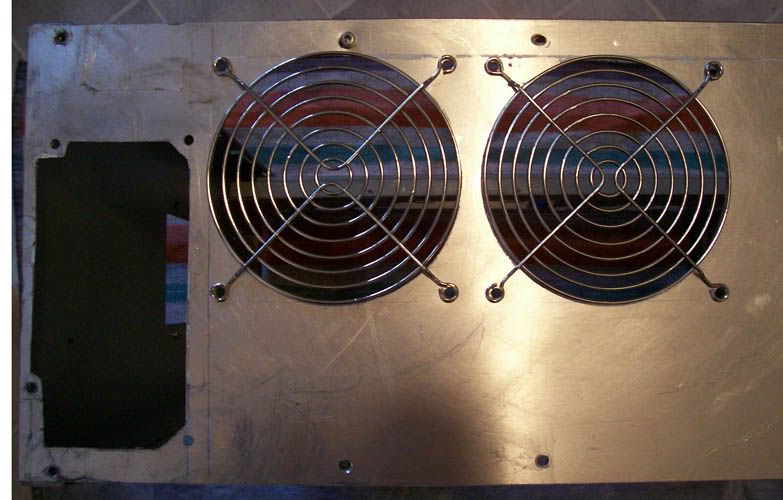
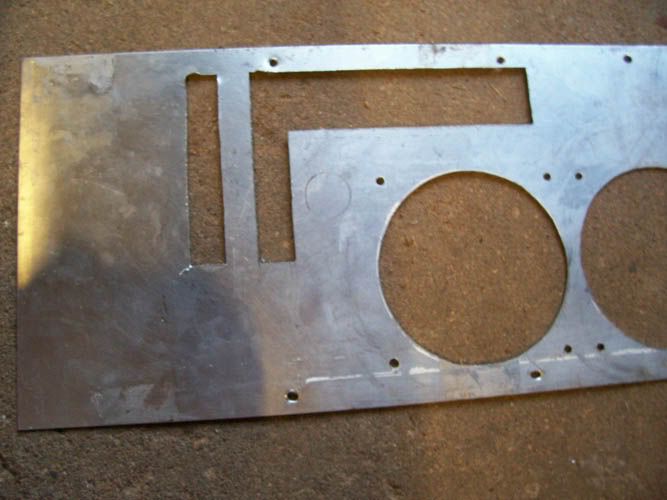
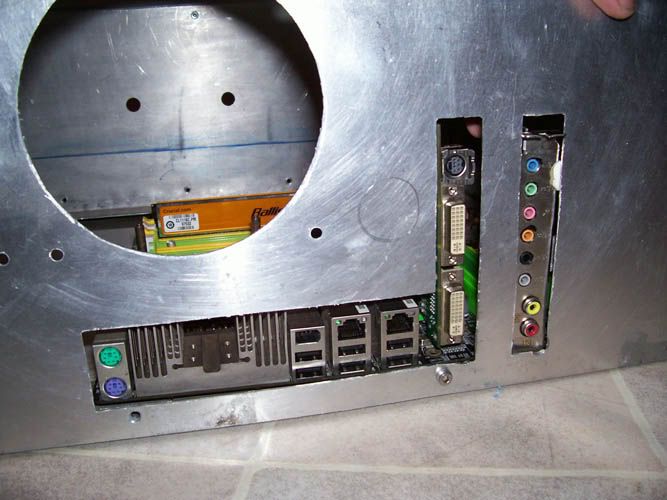
And here is a comparison of the two back panels. Just need to make the two holes for the ports and the bottom slot holes along with the I/O rectanglar hole for the necessary lends.

Tomorrow i will do those holes. Getting this thing on the road again.
Peace out
DoOb's
Ok i was gonna use masking tape all over but decided rather just layer the jigsaw base with the stuff. I also applied oil on the base of the jigsaw and also on the back panel. So that the jigsaw ran smooth over the bits of aluminum when getting cut.
And other shot of the jigsaw with the layered amount of masking tape.
And now when i got just over half way i put a clamp under the one side with a block of wood to stop the off cut circle from flapping the **** out of the panel and bending anything. Afraid i didnt take a pic tho. But here are both holes cut with a jigsaw
Using a starter hole to get the 120mm holes started off course.
Then it was time for the PSU hole. As before when it came to about half way when the off cut started flapping, put the clamp with block of wood under neath to restrict damage to the panel via bending.
And here it is a nicely cut hole
I missed a piece on the left side so here it is finished.
And here is a comparison of the two back panels. Just need to make the two holes for the ports and the bottom slot holes along with the I/O rectanglar hole for the necessary lends.
Tomorrow i will do those holes. Getting this thing on the road again.
Peace out
DoOb's

-
Monty
- Forum Moderator
- Posts: 10000
- Joined: 05 Feb 2004, 02:00
- Processor: Intel i5-4690K @ 4.5GHZ
- Motherboard: ASUS Maximus VII Formula
- Graphics card: ASUS GTX970 Strix
- Memory: 4 x 4GB Corsair Dominators
- Location: Messing with your Mind
- Contact:
DoOb wrote:New panels will be made for the inside

what i mean is, are you going to do the same style in the red area as you have done in the green area (the small panel bit that is raised of the big panel)
AND are you going to keep that same style with the remods??
Art Williams wrote:I'm not telling you it is going to be easy, I'm telling you it's going to be worth it.
-
DoOb
- Registered User
- Posts: 2478
- Joined: 02 Aug 2006, 02:00
- Location: Durban, Bluff, Here by the ocean
- Contact:
Did what I said i was gonna do, here are the pics of the small process.....

I get my new ram on Thursday, OCZ Reapers. Those crucials are going back to Andy.
Next i have to file all the edges, and then buy more aluminum for the new motherboard cover. New design but following the other cover in the above pics. I will be extended that GFX card cover into some more shape kinda way. Dont want to redo that one, looks gr8 and doesnt need replacing just extending.
Lighting im thinking of Green now. Red is OLD and Green mobo, will just look mental
DoOb's