nice work dude ... keep it up!
Project: Endorphin (Update! 23/01)
-
DAE_JA_VOO
- Registered User
- Posts: 12310
- Joined: 28 Nov 2005, 02:00
- Location: That other place
- Contact:
Thanks for all your comments guys 
Piece of cake
Thanks for the offer mate
It wouldn't serve much purpose though, as the flow of the water will never go any faster or slower
Just clamp it down to a table, heat up the area you want to bend with a heatgun or bunsen burner, and bend!silv3rback wrote:One question though, how do you bend your plexi?
Oooh... sounds like a nice ideaSamaya wrote:Looks nice man. Pity you don't want to use the whole flow meter. Maybe you still can, if I inpect it maybe I can build you a bar graph indicator for it and you could still incorporate the proper functionality of the flow meter. Let me know, I am rather good with stuff like that
It wouldn't serve much purpose though, as the flow of the water will never go any faster or slower
That guy that used to mod cases. Now I take photos. True story.
-
DAE_JA_VOO
- Registered User
- Posts: 12310
- Joined: 28 Nov 2005, 02:00
- Location: That other place
- Contact:
Updates FTW!!
I've modded like a mad man for the last few days. I basically modded the whole day today, until about a half an hour ago. What an awesome day it was! I love being done with my studies
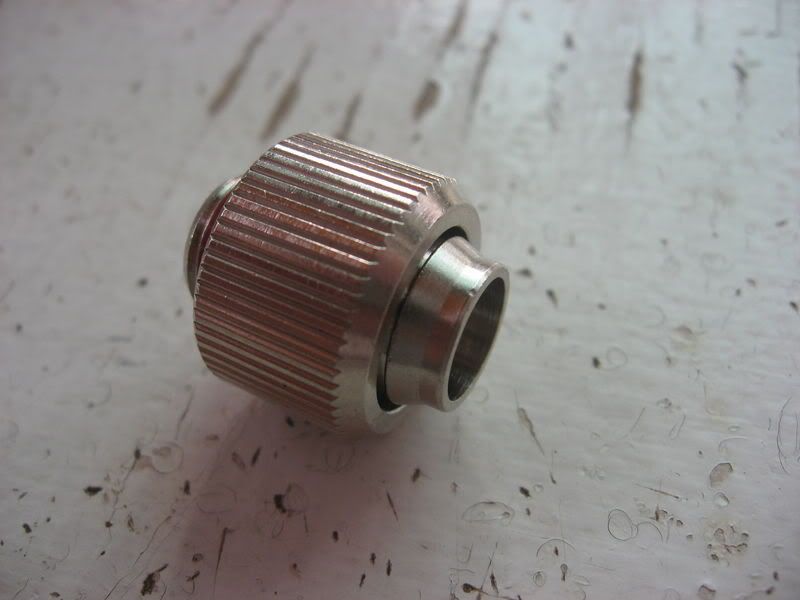
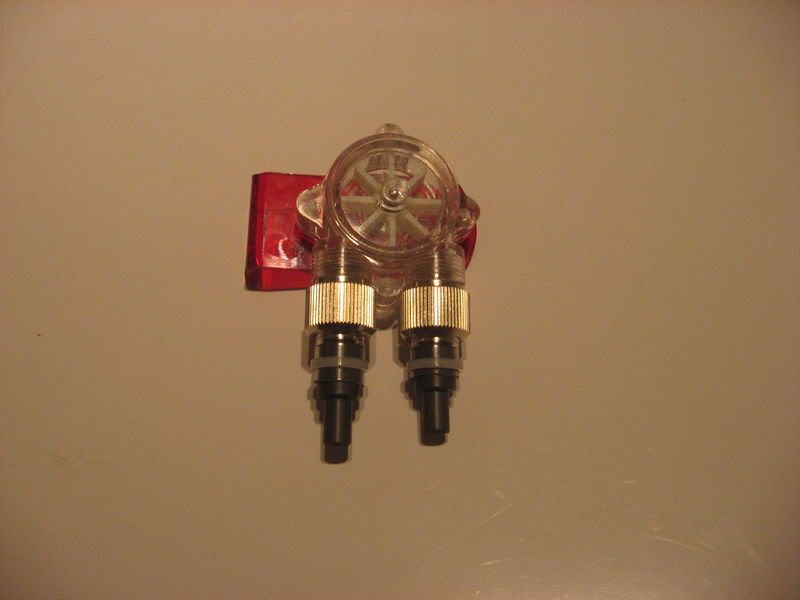
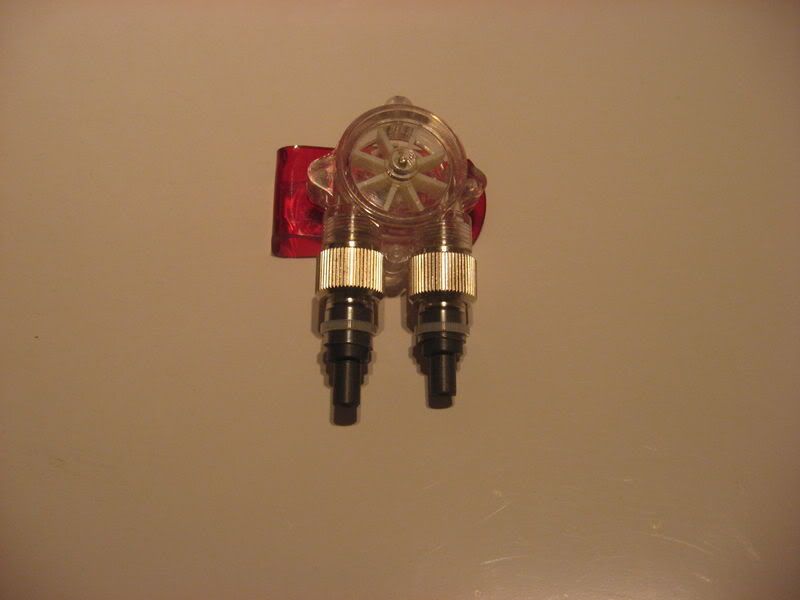
Okay, first off - the Koolance flow meter. I had a bit of a problem, because the flow meter is meant for 10mm tubing, and the entire loop in this machine will be 1/4" (6mm). This is one of the koolance fittings:
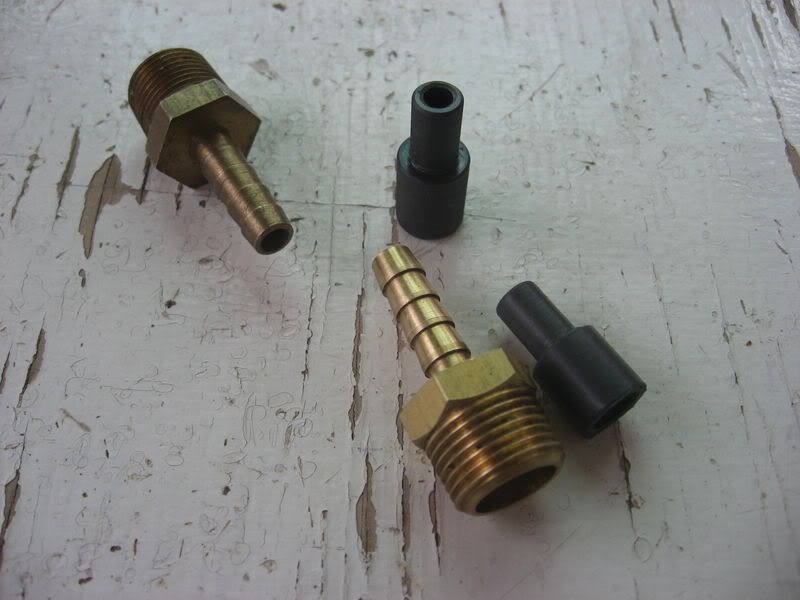
I needed a plan. So i spoke to my step-dad about it and he told me "I'll see what i can do for you tomorrow, just be patient." As it turned out, he machined two adapters for me! They step the 10mm down to 6mm! Awesomeness! I also needed brabs for my Swiftech Raddy (for some or other reason, the barbs i got from P-PCs for the raddy were the COMPLETE wrong size...). So, here are the two adapters and the two barbs:
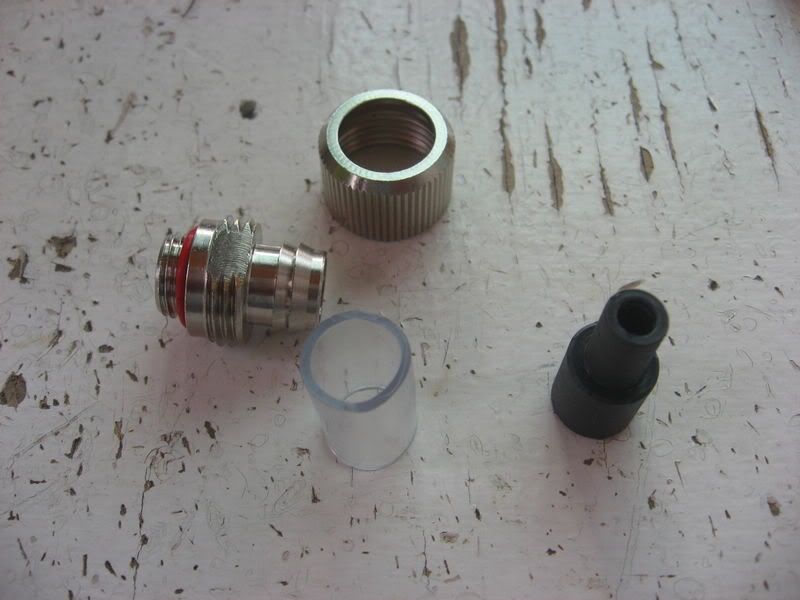
So here the combo i made for my flow meter so that it's basically a 6mm now:
For some or other reason, i didn't take a photo of the adapters in place... oh well, there are pics later in the update
Moving along...
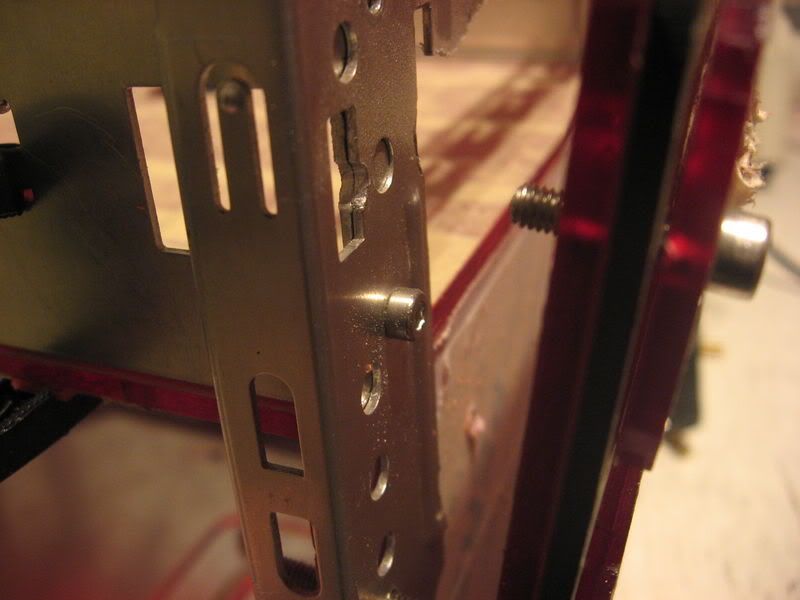
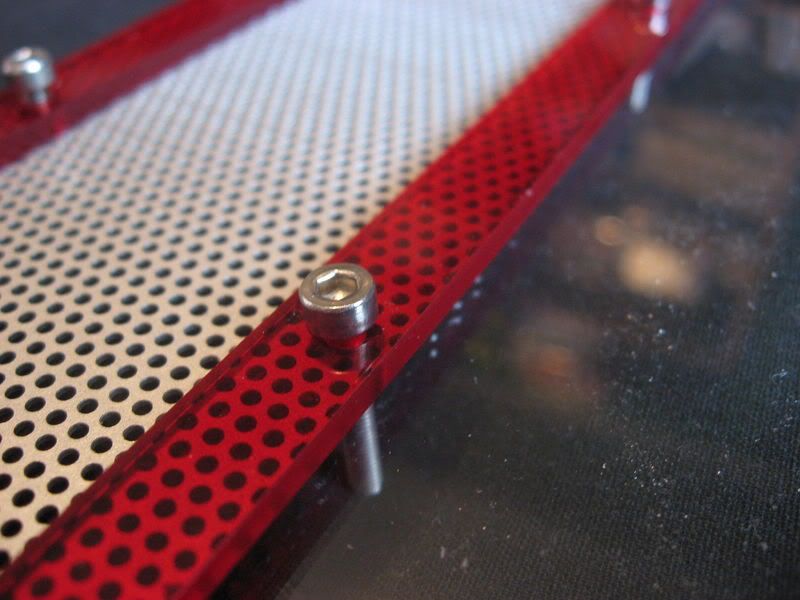
The front panel didn't actually fit in place 100%, because the screws that hold the support beams in place were in the way. Look:
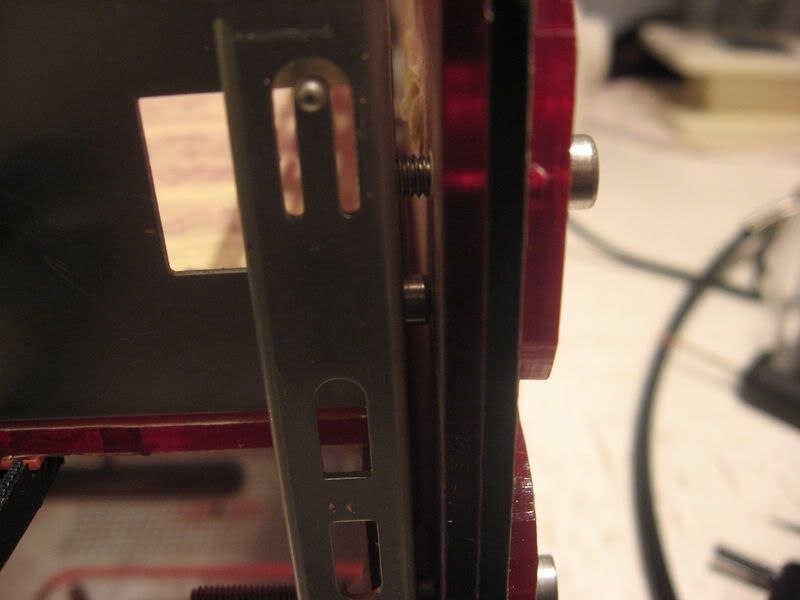
The screw:
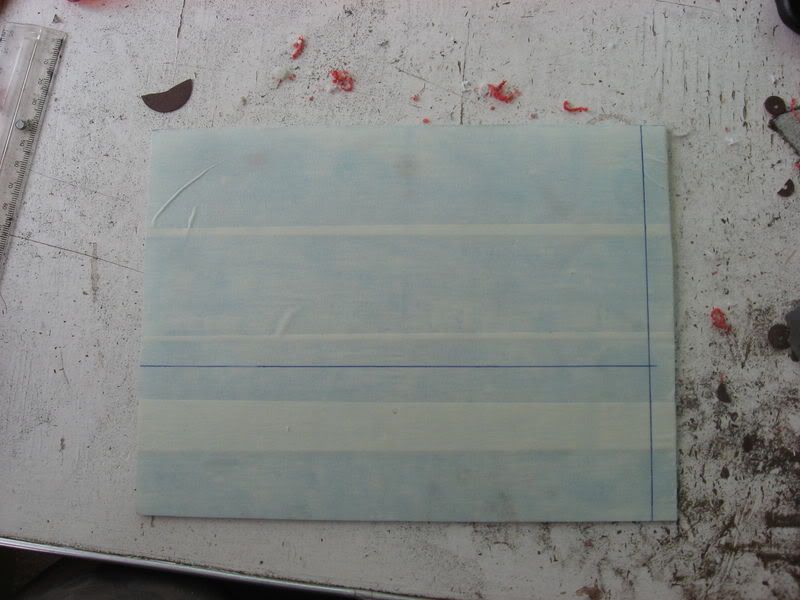
So i need to drill a hole in the first layer of plexi in the front panel so that the screw sinks into the plexi. I was puzzled a bit for a while... "How the hell am i gonna mark where to drill that hole?!" and then i had an Epiphany (lol?). Here was my answer:
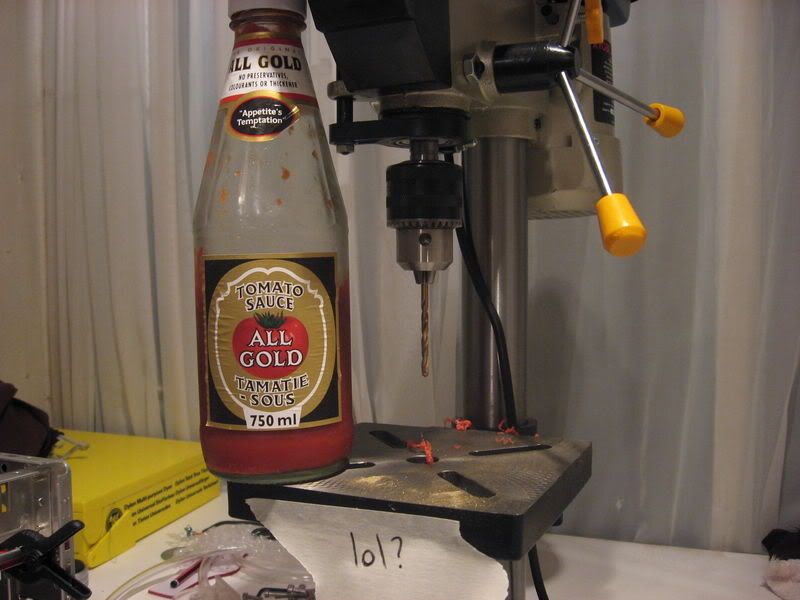
Tomato Sauce!
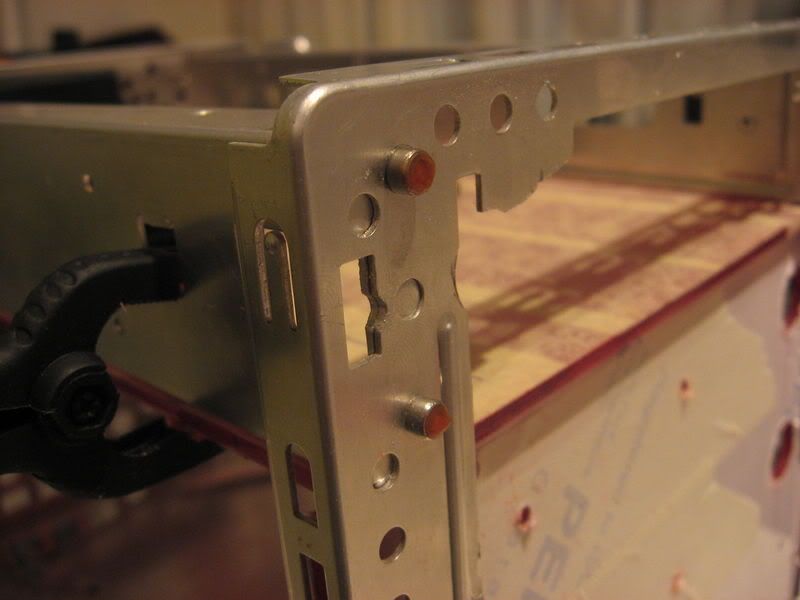
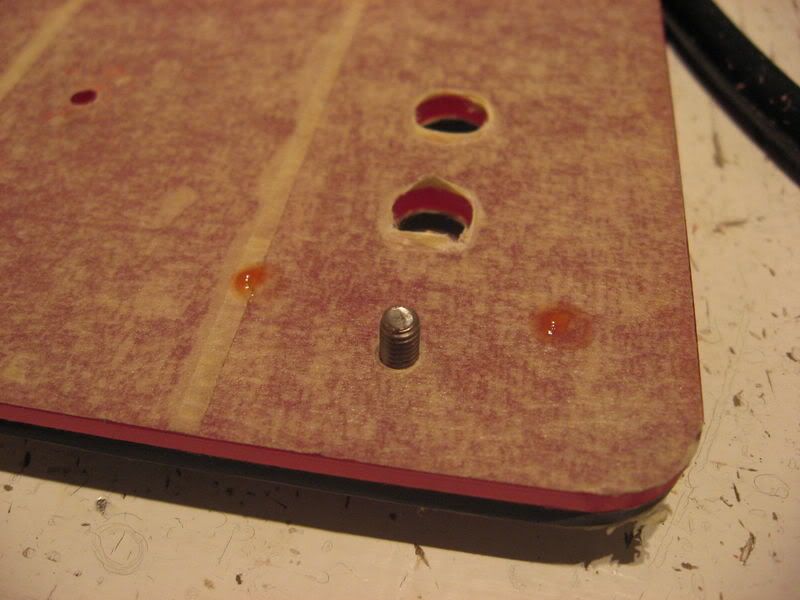
Voila!

We need to be resourceful modders!
Next up, i shortened some 4mm alen cap screws for the reservoir mounting:
(i think i went through an entire reinforced dremel disc shortening these screws)
Reservoir mountings fitted:
Reservoirs fitted and tubing attached:
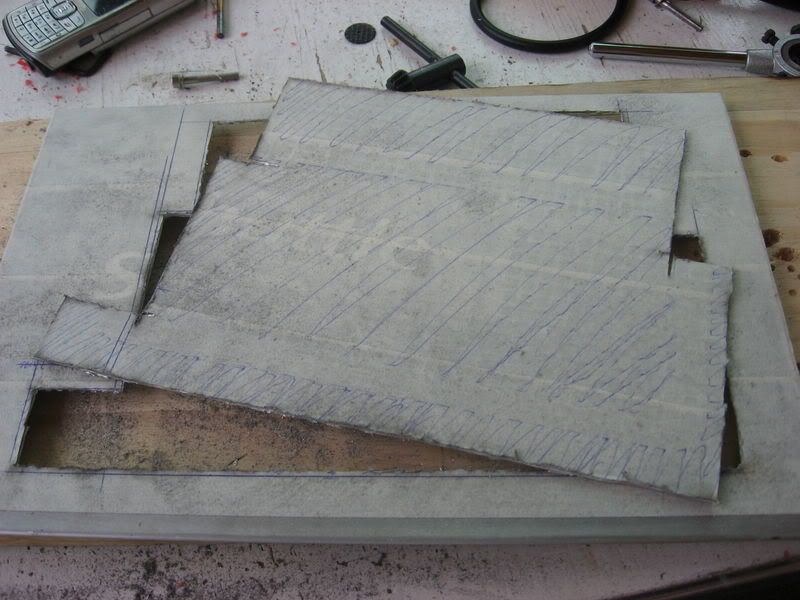
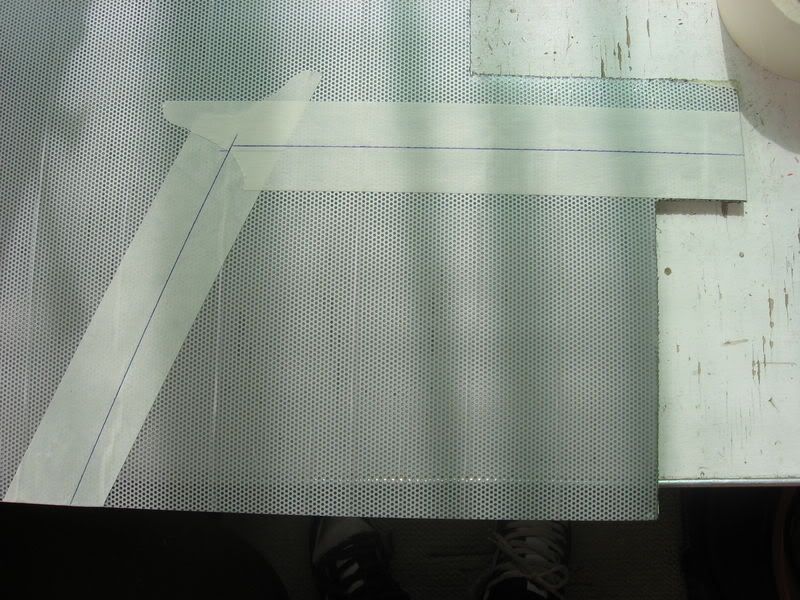
Then i moved on to the side panel. I wanted to leave this panel and have it laser cut (it's not like i can just go out and buy another side panel if i screw this one up) but i was in such a mood for modding that i just decided to do it by hand. I was quite scared because, believe it or not, i've NEVER worked with Alu, ever. So, here's the panel:
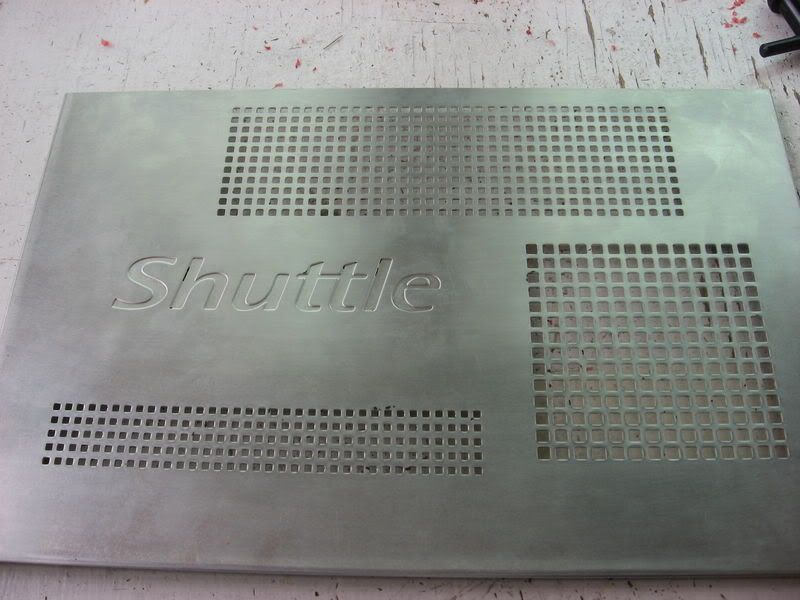
Masked up:
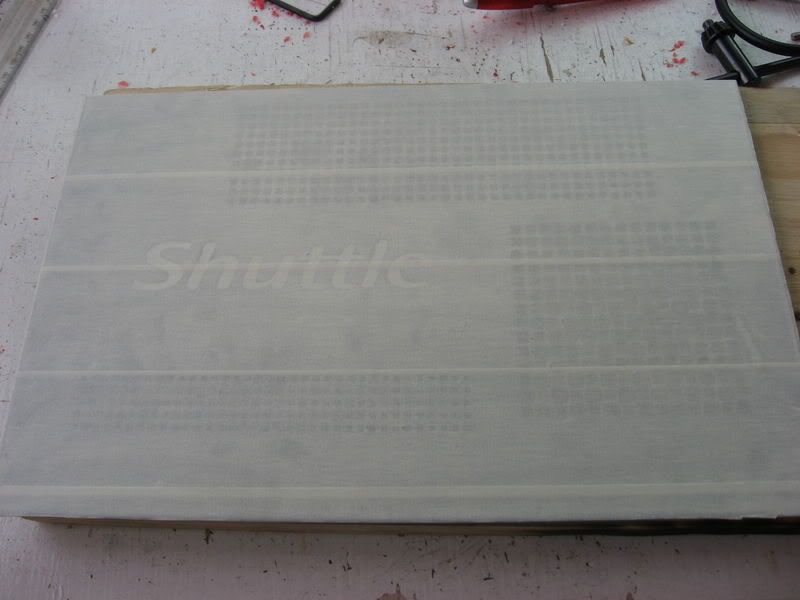
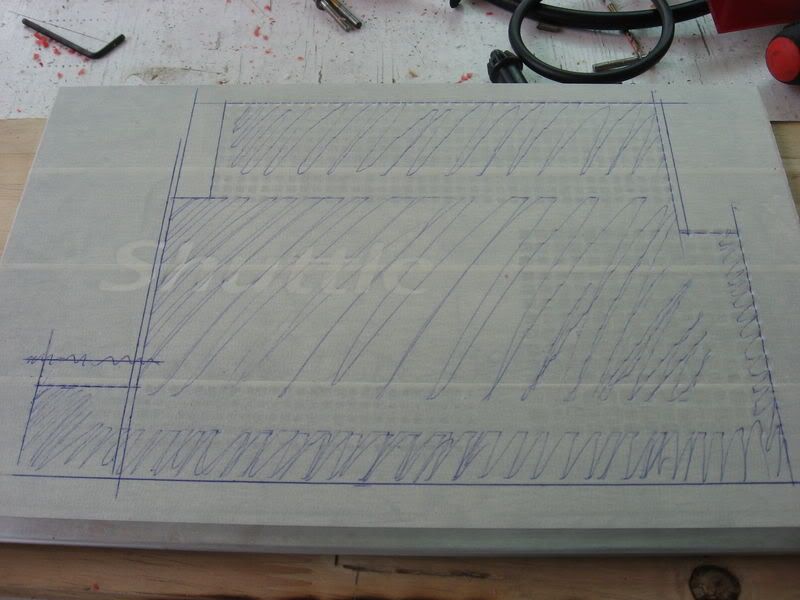
I spent quite a while marking off what i should cut:
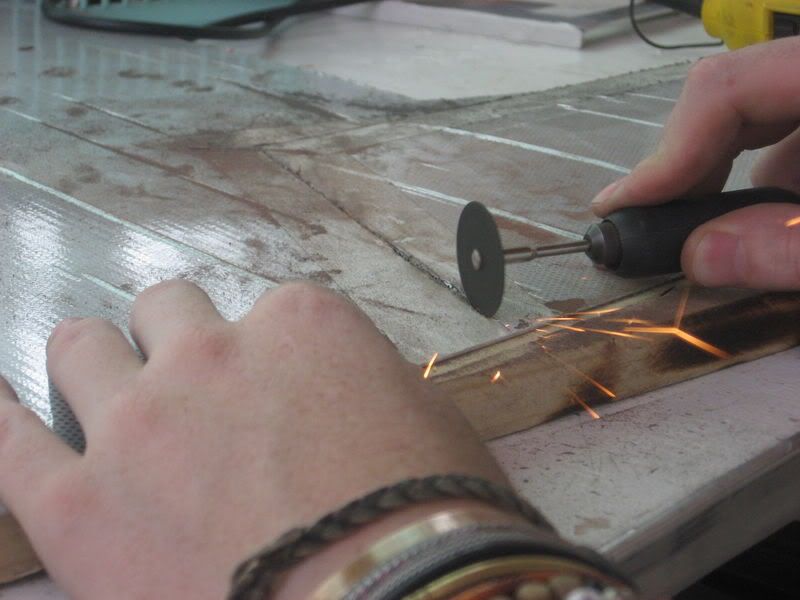
Half way:
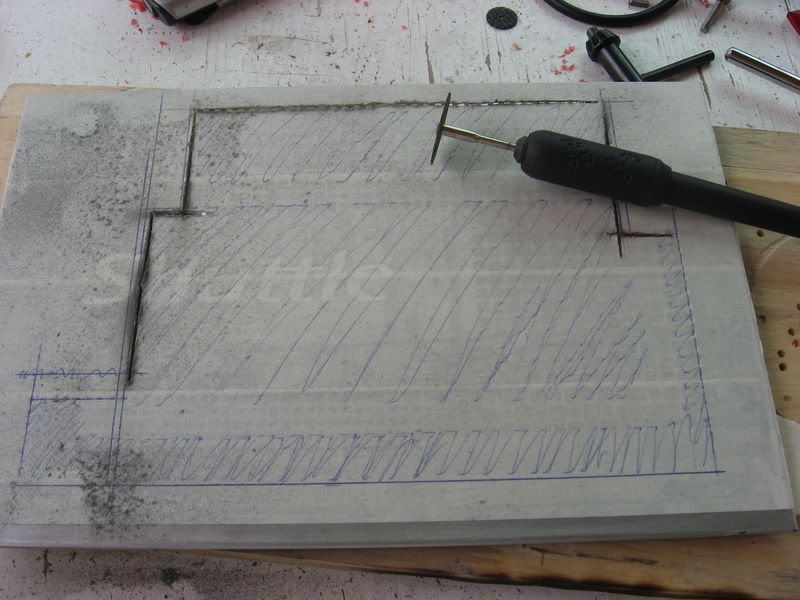
Cutting done:
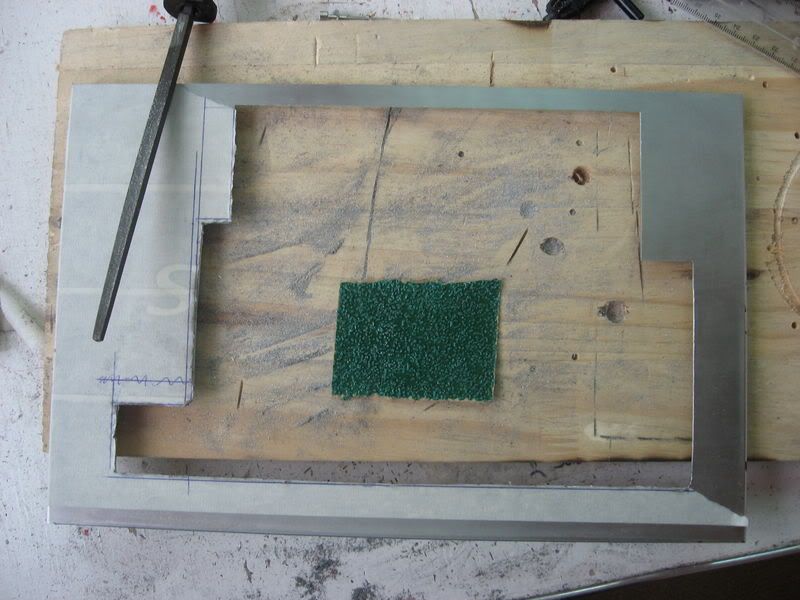
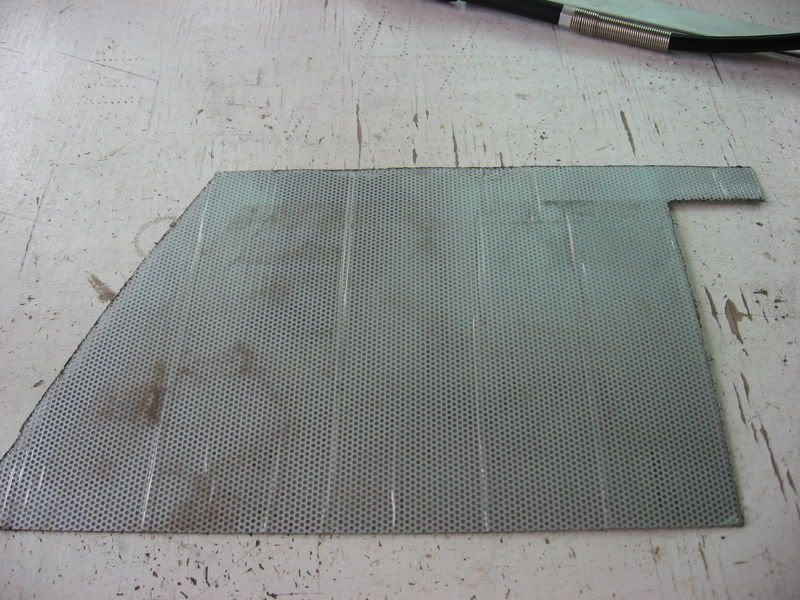
Now came the tedious and time consuming task of sanding and filing the edges straight. Here i was about half way:
Done:
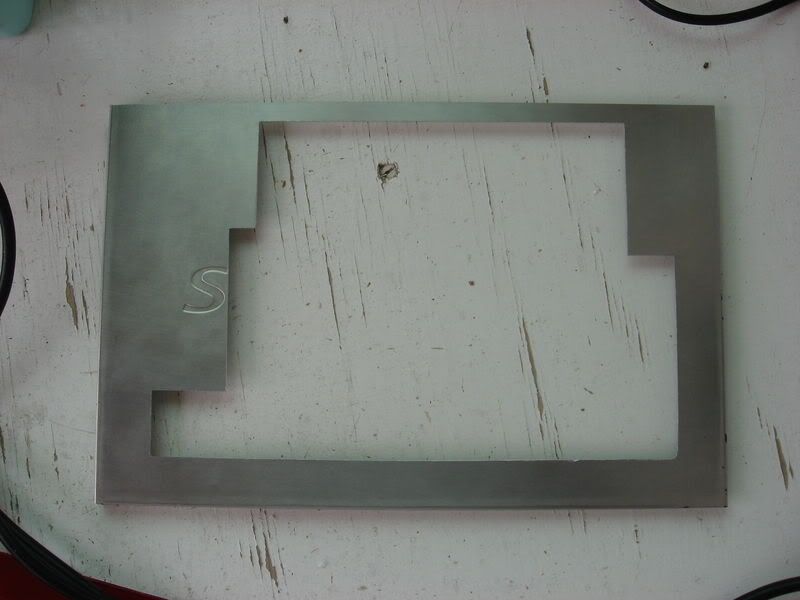
One or two corners need a bit more filing, but otherwise, it's not bad for a first time
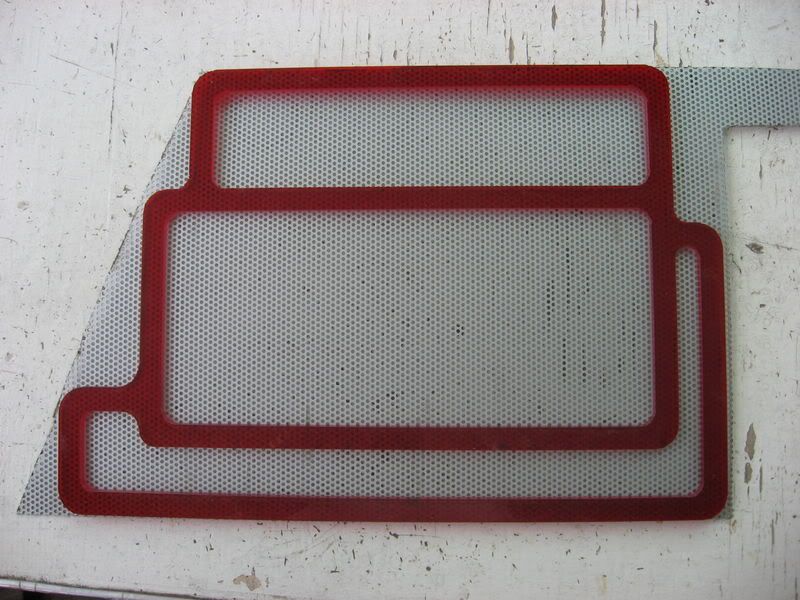
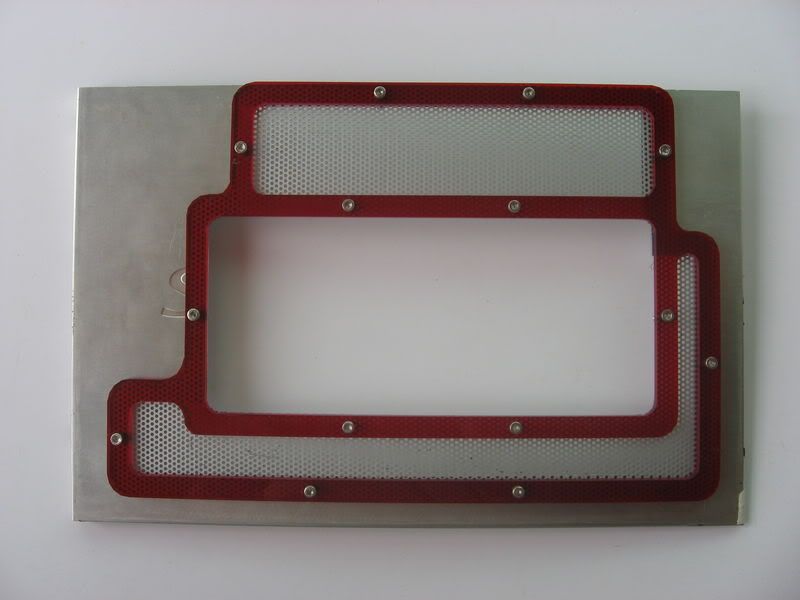
Then i did a test fit of the frame:
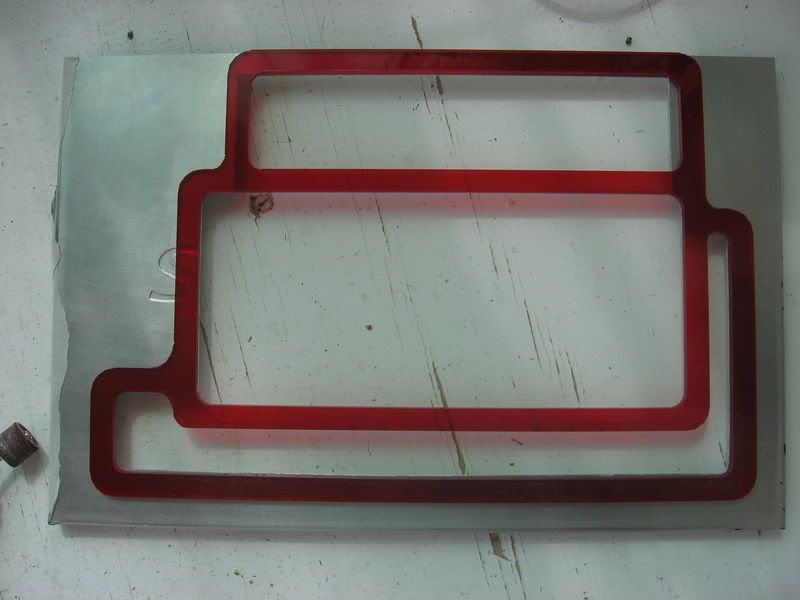
As you can see, there are actually parts of the panel still in view there. That's not problem though, as there will be mesh in the top and bottom holes, the middle hole will be a window.
Next up was the mesh. I want the mesh piece to be one BIG piece with a hole in the middle for the window. this will leave a cool effect with the mesh under the red plexi. So i marked off the mesh i want to cut out:
Cutting:
Done:
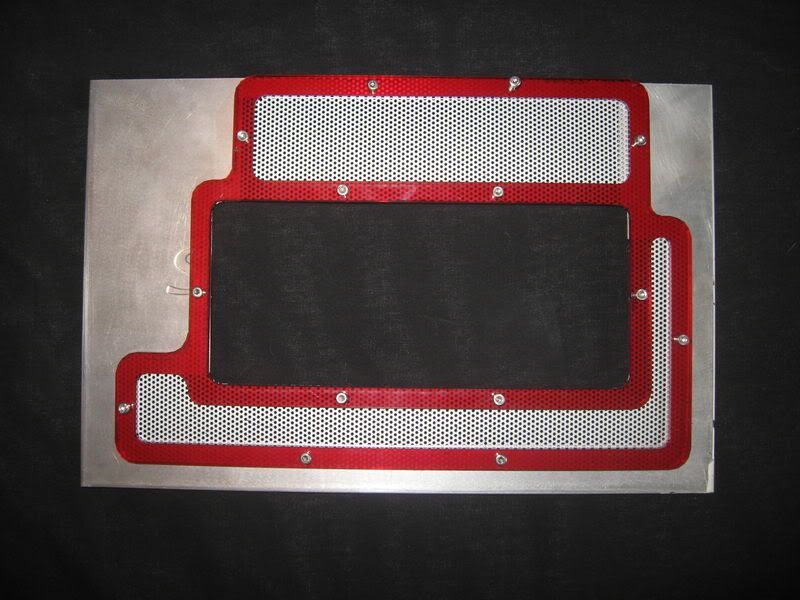
Quick look of the mesh under the panel:
Bear in mind that the middle hole will be cut out
That's as far as i got with the window, as i got sick and tired of sanding and filing. I'll finish it tomorrow.
Hmmm... what's next...
Ahh, the top panel. All along i've been wondering what to do with my top panel. A plain black panel just isn't gonna cut it. That's where i got the flow meter idea. I'm sure some of you have been wondering what the point of the flow meter is if it's inside, right? Well, that's what will be one of the things to add some detail to the top panel. Marked off the panel:
Small pilot hole drilled:
40mm hole made:
The BASIC idea:
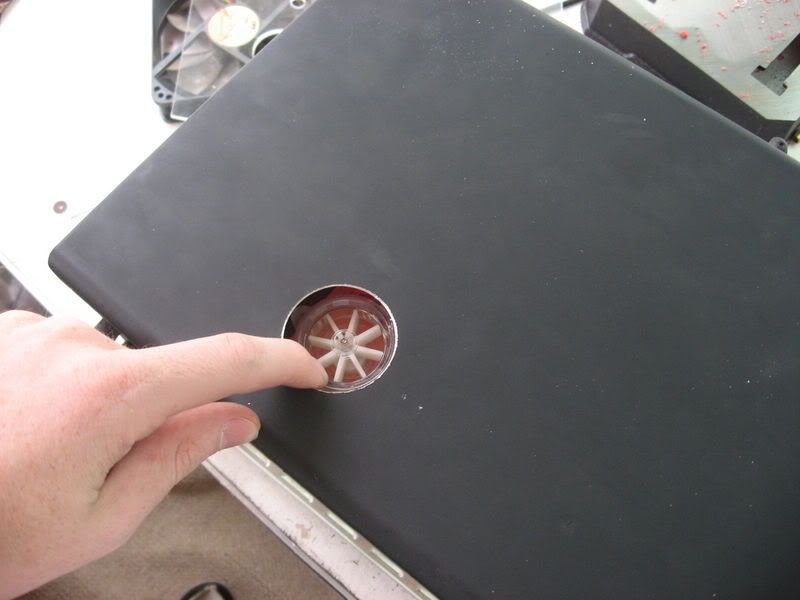
That idea will obviously still get "optimized" a hell of a lot, but that's just to give you an idea. When i'm finished, the flow meter will be MUCH closer to the top, and the very top of the meter might actually stick out of the panel. Alternatively, i can make a little window. I'll see how it goes.
I ran into a slight problem though. The bracket i made for the flow meter couldn't work anymore. I'm not sure how i measured wrong, but the flow meter was about 4mm too far INTO the case (like... horizontally), so my only option was to remake the bracket i had made a few days ago.
Here's the old bracket (you can also see how i've stepped the tubing down to 6mm here):
And the new one:
A nice comparisson:
Another nice comparisson:
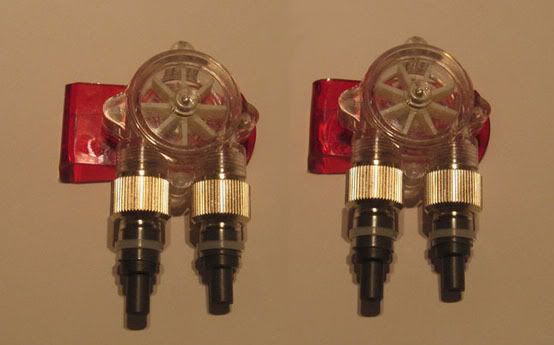
As you can see, the difference is VERY slight, but it's there. It's only a couple of millimeters. If i hadn't made the new bracket, the meter wouldn't have been in the center of that hole, and that just won't do.
So, that's all i have for you now. I'll continue tomorrow. I'm planning on making a nice plexi panel for the top of the case, which will also have a hole in for the flow meter. Ooh it's gonna be sexy
Anyway, cheers guys, sleep well. I'm dead tired.
I've modded like a mad man for the last few days. I basically modded the whole day today, until about a half an hour ago. What an awesome day it was! I love being done with my studies
Okay, first off - the Koolance flow meter. I had a bit of a problem, because the flow meter is meant for 10mm tubing, and the entire loop in this machine will be 1/4" (6mm). This is one of the koolance fittings:
I needed a plan. So i spoke to my step-dad about it and he told me "I'll see what i can do for you tomorrow, just be patient." As it turned out, he machined two adapters for me! They step the 10mm down to 6mm! Awesomeness! I also needed brabs for my Swiftech Raddy (for some or other reason, the barbs i got from P-PCs for the raddy were the COMPLETE wrong size...). So, here are the two adapters and the two barbs:
So here the combo i made for my flow meter so that it's basically a 6mm now:
For some or other reason, i didn't take a photo of the adapters in place... oh well, there are pics later in the update
Moving along...
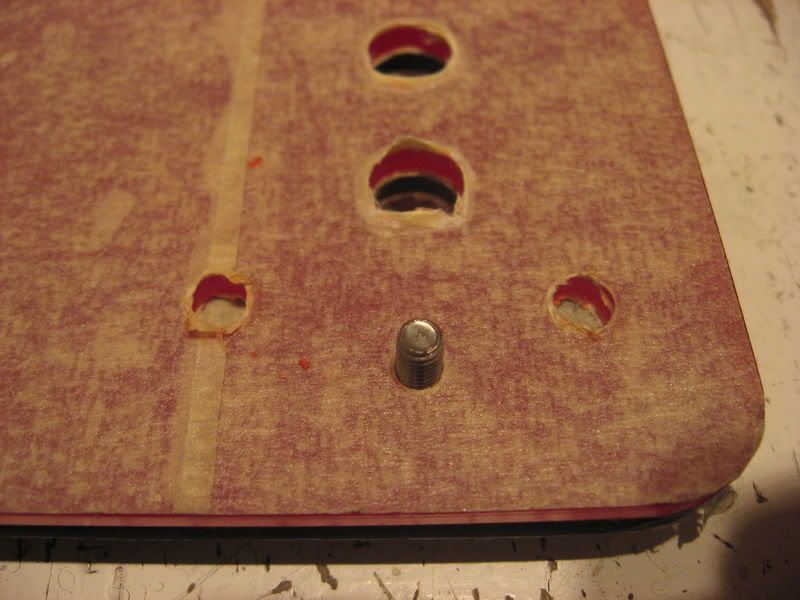
The front panel didn't actually fit in place 100%, because the screws that hold the support beams in place were in the way. Look:
The screw:
So i need to drill a hole in the first layer of plexi in the front panel so that the screw sinks into the plexi. I was puzzled a bit for a while... "How the hell am i gonna mark where to drill that hole?!" and then i had an Epiphany (lol?). Here was my answer:
Tomato Sauce!
Voila!
We need to be resourceful modders!
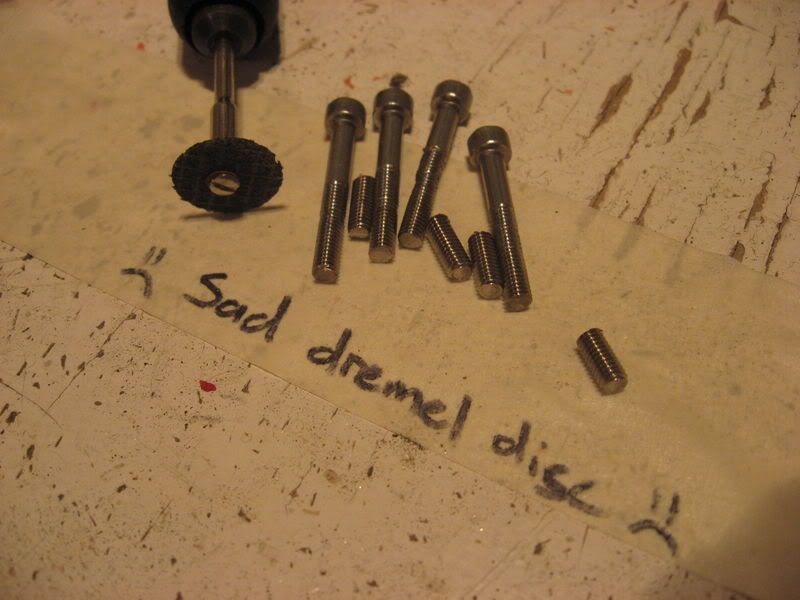
Next up, i shortened some 4mm alen cap screws for the reservoir mounting:
(i think i went through an entire reinforced dremel disc shortening these screws)
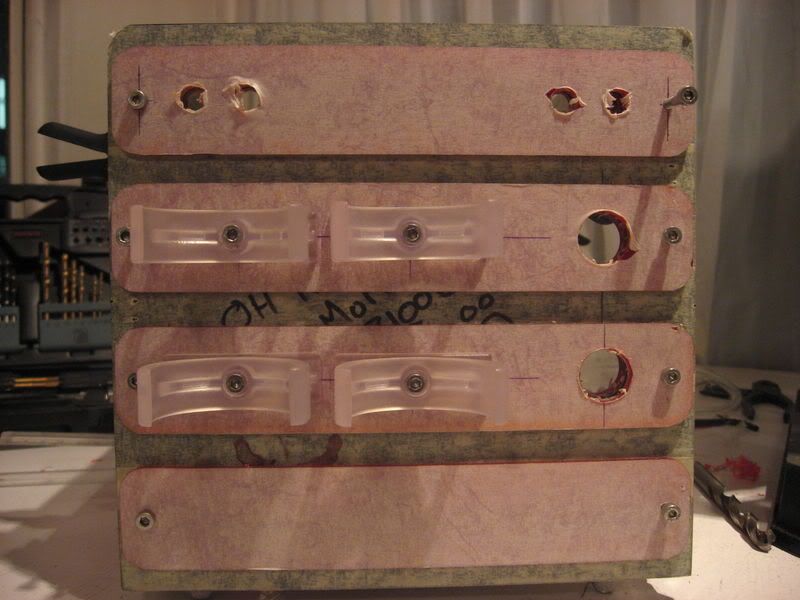
Reservoir mountings fitted:
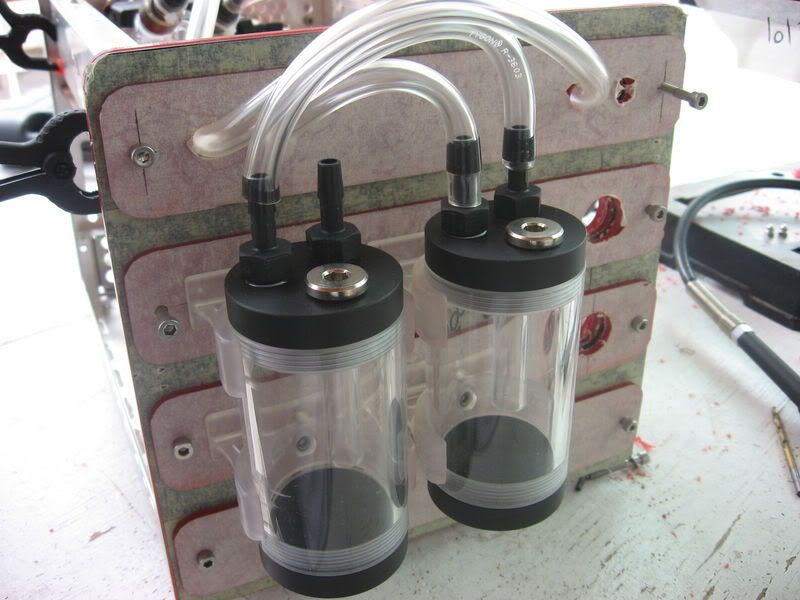
Reservoirs fitted and tubing attached:
Then i moved on to the side panel. I wanted to leave this panel and have it laser cut (it's not like i can just go out and buy another side panel if i screw this one up) but i was in such a mood for modding that i just decided to do it by hand. I was quite scared because, believe it or not, i've NEVER worked with Alu, ever. So, here's the panel:
Masked up:
I spent quite a while marking off what i should cut:
Half way:
Cutting done:
Now came the tedious and time consuming task of sanding and filing the edges straight. Here i was about half way:
Done:
One or two corners need a bit more filing, but otherwise, it's not bad for a first time
Then i did a test fit of the frame:
As you can see, there are actually parts of the panel still in view there. That's not problem though, as there will be mesh in the top and bottom holes, the middle hole will be a window.
Next up was the mesh. I want the mesh piece to be one BIG piece with a hole in the middle for the window. this will leave a cool effect with the mesh under the red plexi. So i marked off the mesh i want to cut out:
Cutting:
Done:
Quick look of the mesh under the panel:
Bear in mind that the middle hole will be cut out
That's as far as i got with the window, as i got sick and tired of sanding and filing. I'll finish it tomorrow.
Hmmm... what's next...
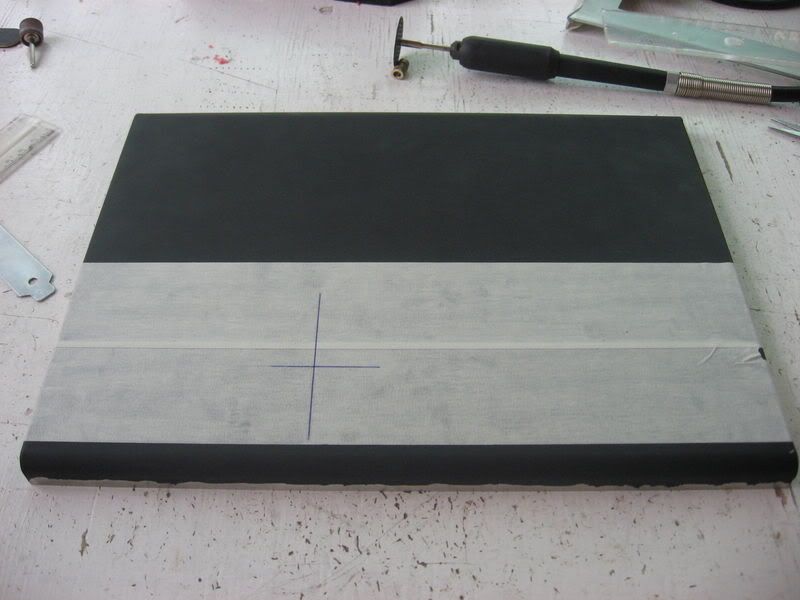
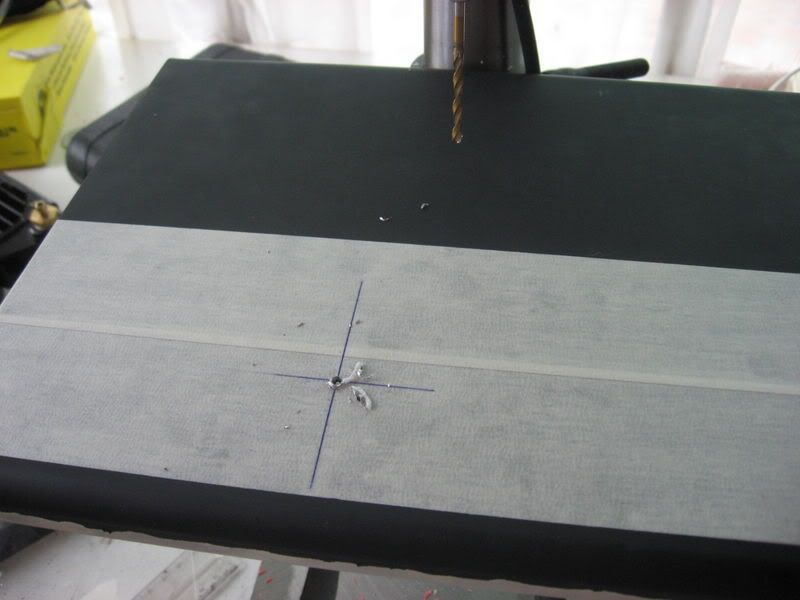
Ahh, the top panel. All along i've been wondering what to do with my top panel. A plain black panel just isn't gonna cut it. That's where i got the flow meter idea. I'm sure some of you have been wondering what the point of the flow meter is if it's inside, right? Well, that's what will be one of the things to add some detail to the top panel. Marked off the panel:
Small pilot hole drilled:
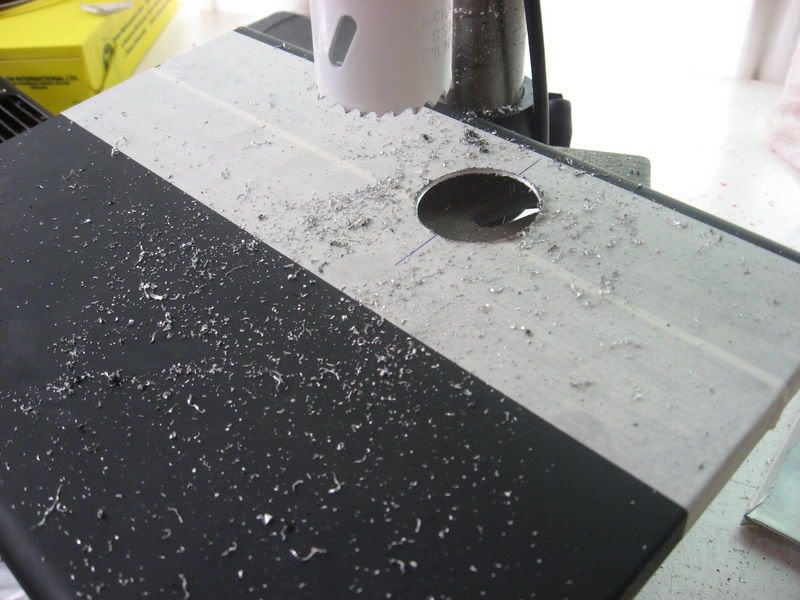
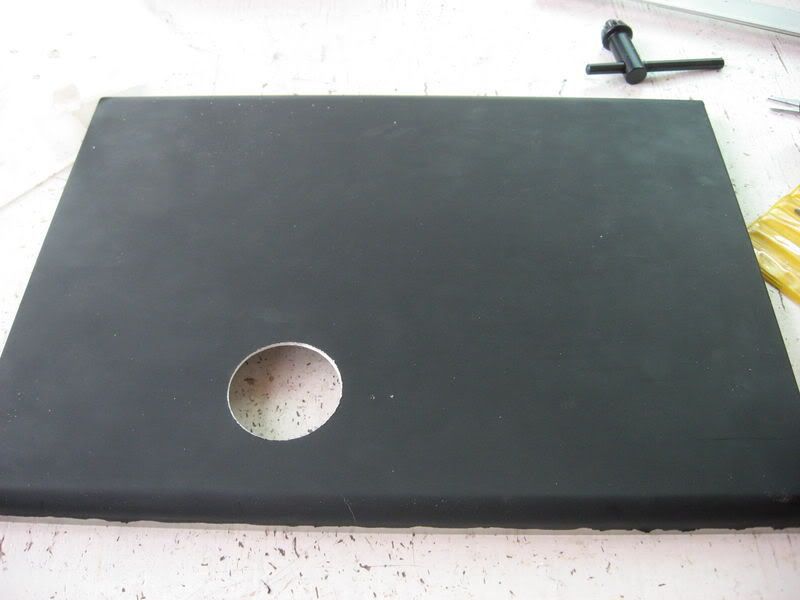
40mm hole made:
The BASIC idea:
That idea will obviously still get "optimized" a hell of a lot, but that's just to give you an idea. When i'm finished, the flow meter will be MUCH closer to the top, and the very top of the meter might actually stick out of the panel. Alternatively, i can make a little window. I'll see how it goes.
I ran into a slight problem though. The bracket i made for the flow meter couldn't work anymore. I'm not sure how i measured wrong, but the flow meter was about 4mm too far INTO the case (like... horizontally), so my only option was to remake the bracket i had made a few days ago.
Here's the old bracket (you can also see how i've stepped the tubing down to 6mm here):
And the new one:
A nice comparisson:
Another nice comparisson:
As you can see, the difference is VERY slight, but it's there. It's only a couple of millimeters. If i hadn't made the new bracket, the meter wouldn't have been in the center of that hole, and that just won't do.
So, that's all i have for you now. I'll continue tomorrow. I'm planning on making a nice plexi panel for the top of the case, which will also have a hole in for the flow meter. Ooh it's gonna be sexy
Anyway, cheers guys, sleep well. I'm dead tired.
That guy that used to mod cases. Now I take photos. True story.
-
fiber-optics
- Registered User
- Posts: 5393
- Joined: 01 Apr 2007, 02:00


-
Vampyre_2099
- Registered User
- Posts: 1321
- Joined: 04 Nov 2007, 02:00
- Location: /home/jhb/fourways

-
DarkRanger
- Registered User
- Posts: 8346
- Joined: 10 May 2006, 02:00
- Processor: Intel i5-3750
- Motherboard: Gigabyte
- Graphics card: nVidia GTX 550Ti
- Memory: 8GB Jetram
- Contact:
LOL @ The we need to use resources part. 
Dae, this is AWESOME! Congrats on the panel cutting that went SOOO well, it looks awesome and to handle pressure like that, wow. I know how much that sidepanel cut meant to you and damn, you got that spot on!!
As for the flow meters: Difference??? I don't see no difference....
Dae, this is AWESOME! Congrats on the panel cutting that went SOOO well, it looks awesome and to handle pressure like that, wow. I know how much that sidepanel cut meant to you and damn, you got that spot on!!

As for the flow meters: Difference??? I don't see no difference....

-
DAE_JA_VOO
- Registered User
- Posts: 12310
- Joined: 28 Nov 2005, 02:00
- Location: That other place
- Contact:
Thanks for the comments guys
Update time.
I wasn't planning on posting an update, but i'm bored and at home, so instead of playing Forza 2 for another few hours or watching this David Gilmour DVD again, i thought i'd post an update.
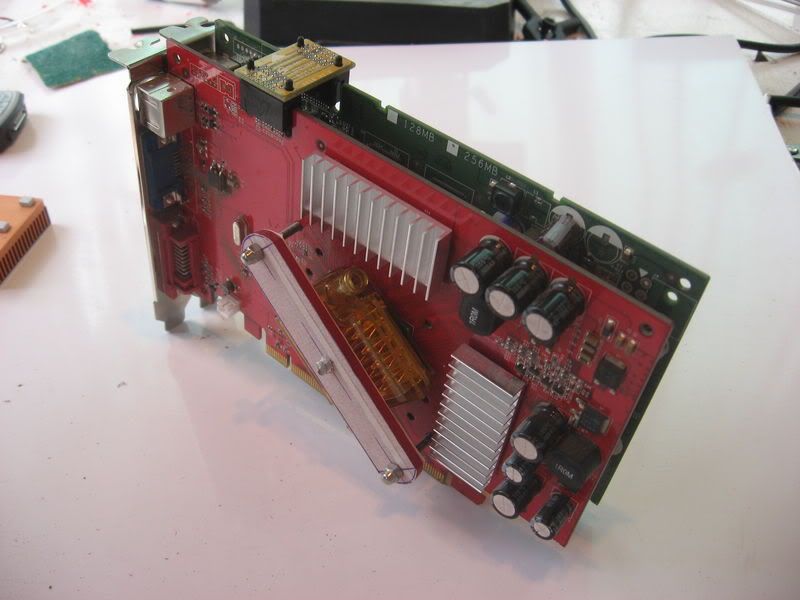
Alright, here are my two 7600GTs that i'll be SLI-ing in this shuttle:
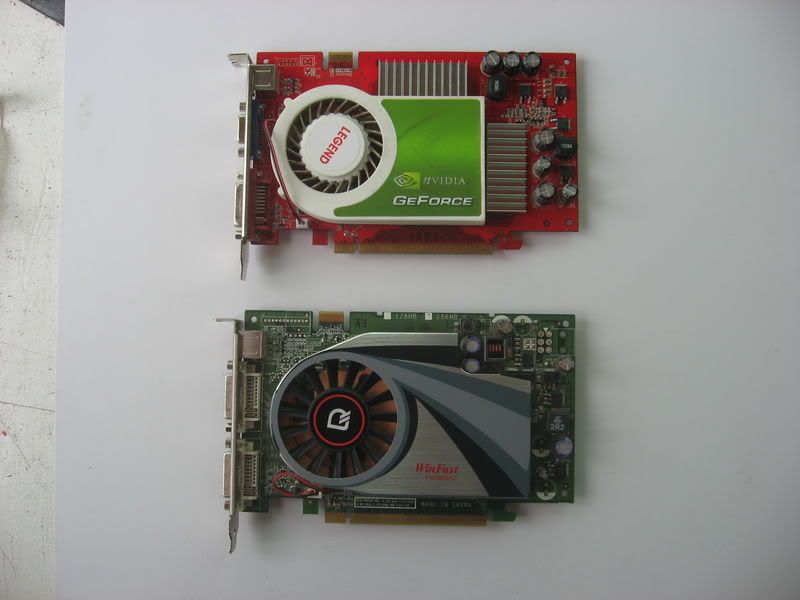
Yes yes, i know that their made by a different Vendor. Long story behind that that nobody cares about, but the point is that they'll work together, but i have to do some modding first! See, when i first got this shuttle, i had my two 7800GTs in here:
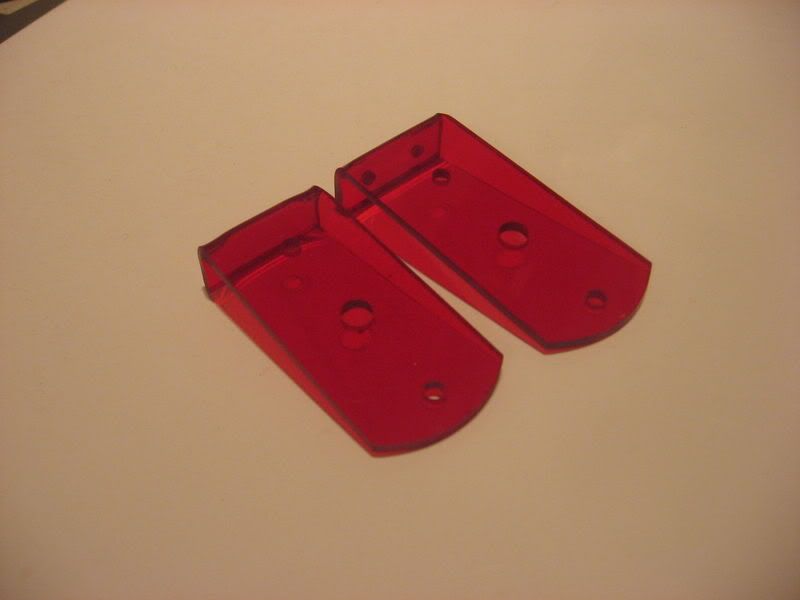
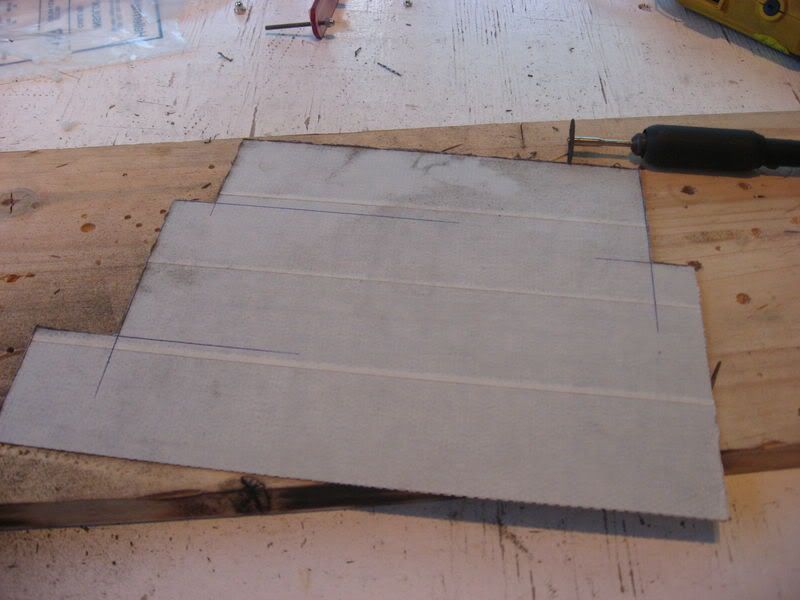
I had to mod their coolers though, but luckily i wont need to mod any coolers, because the coolers are coming off. So here's what i did. I measured up two identical pieces of plexi that will act as mounting hardware:
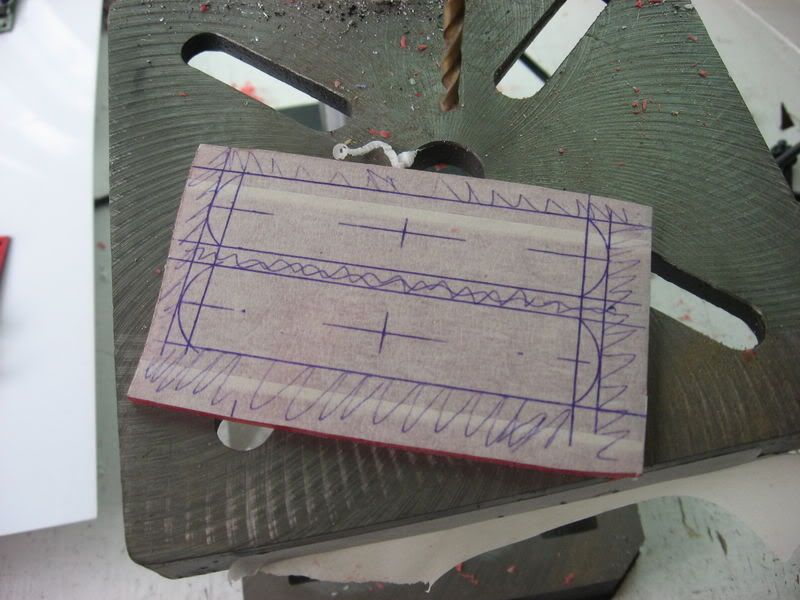
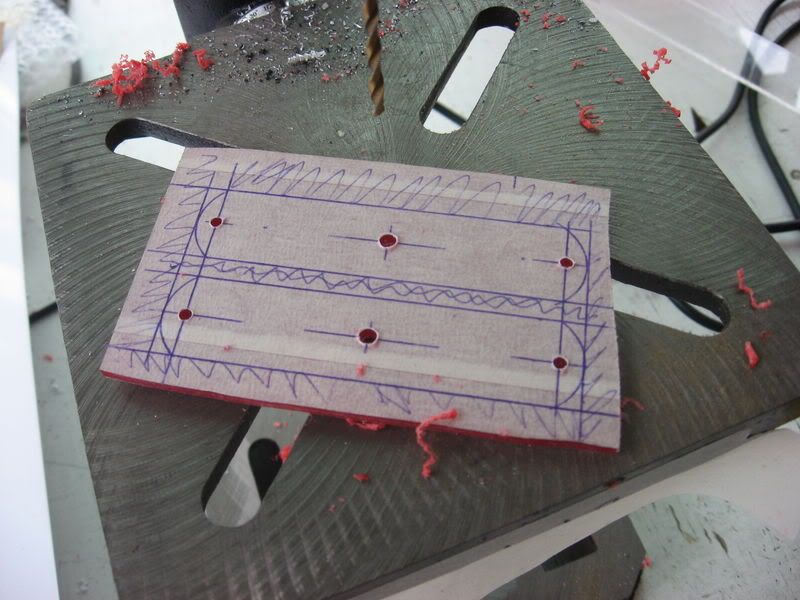
Drilled the holes FIRST (only learned this little tip a few weeks ago):
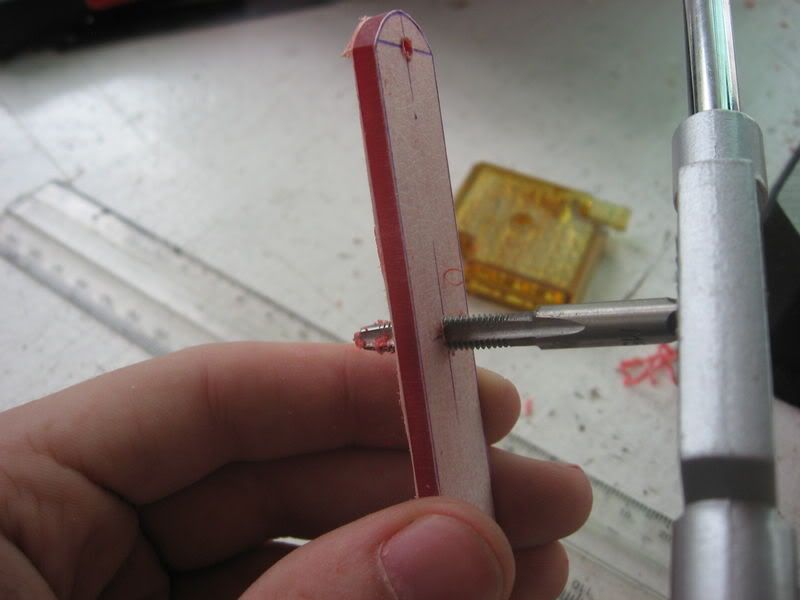
After cutting them out, i tapped the 4mm holes in the middle with a 5mm thread:
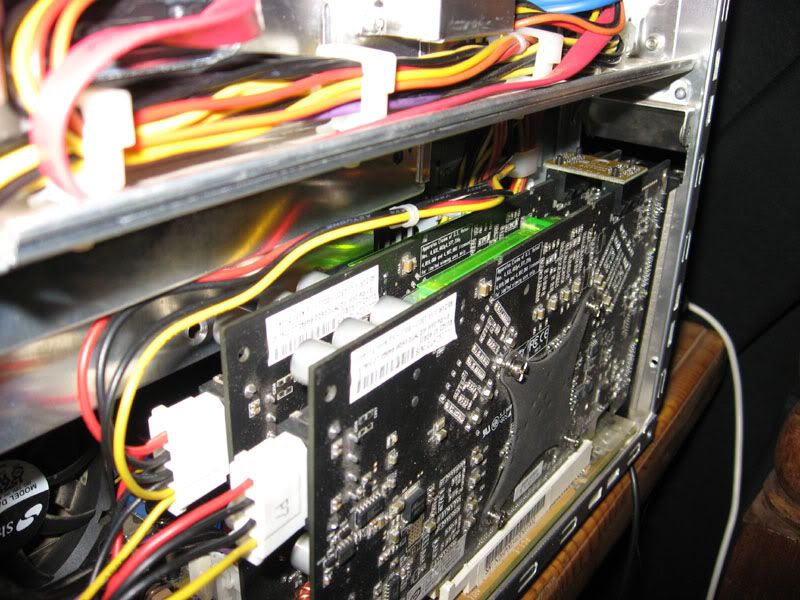
And here is the setup of the two cards. Reminds me SO much of the 7950GX2:
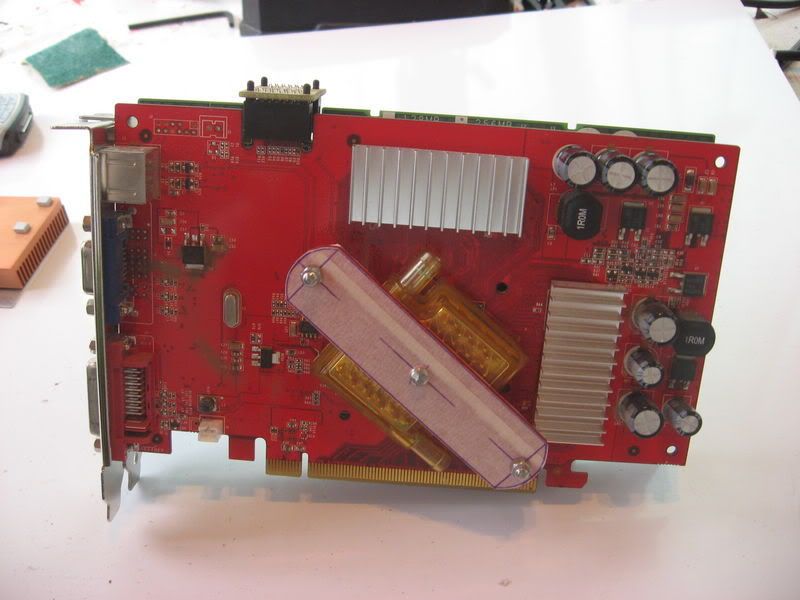

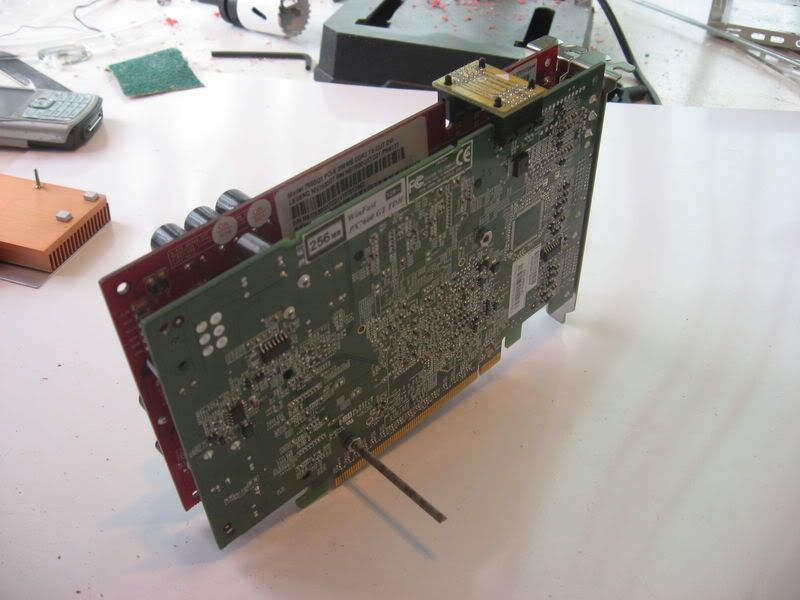
Obviously it will look a million times better when i'm finished. I still need to make appropriately long 3mm rods, polish the plexi, and also get a nice 5mm dome nut for the Legend card's mounting.
I also did some more tubing work:
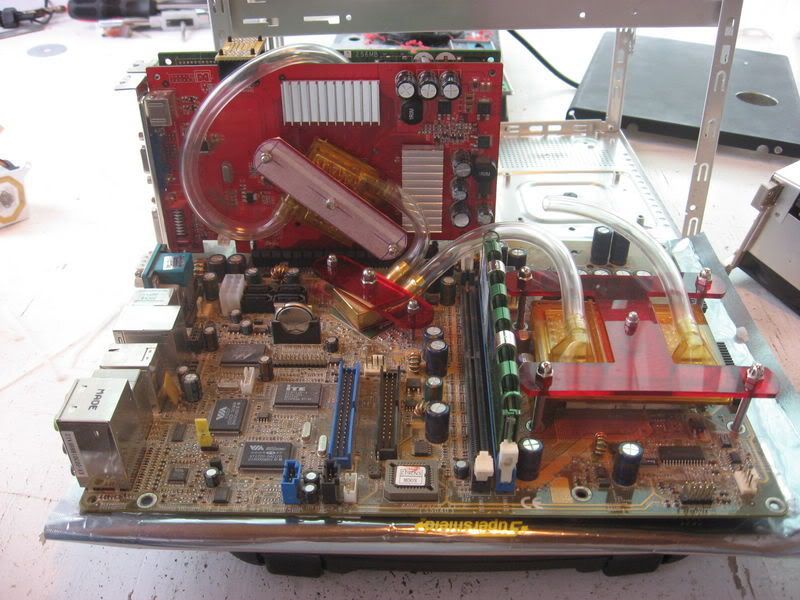
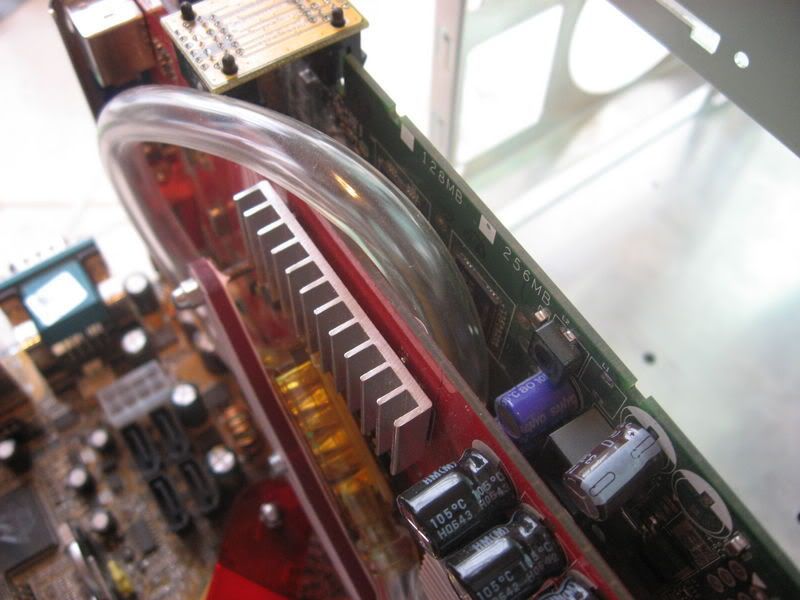
Ignore the slight kink between the chipset and first video card, that will be sorted out
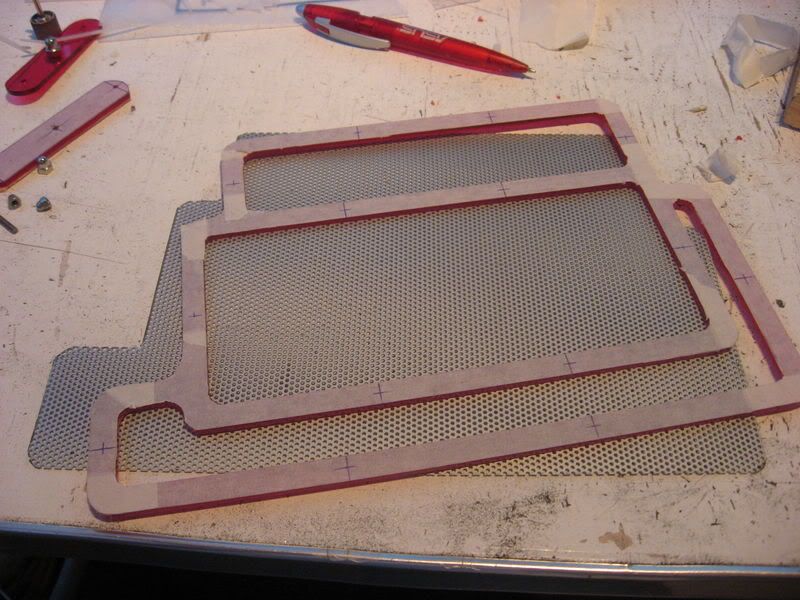
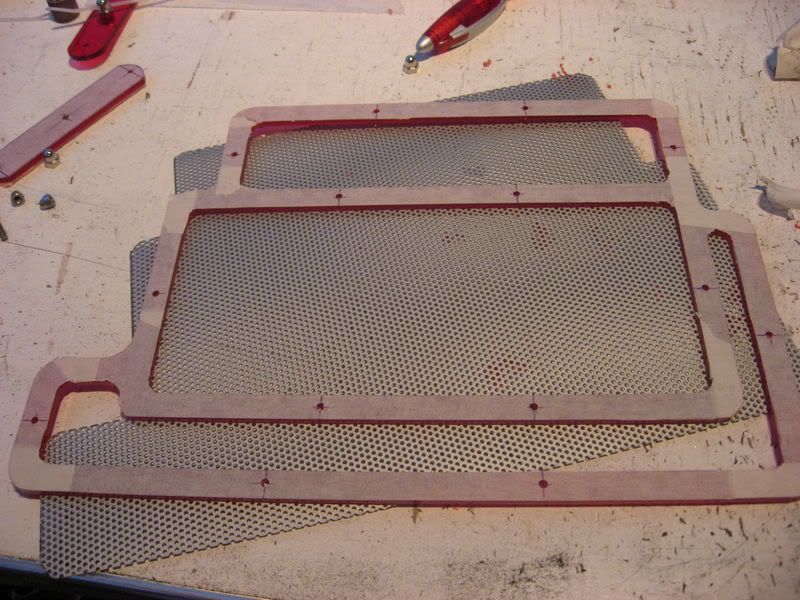
Then i started some more work on the mesh. Ahh man i hate working on this mesh... Cut out:
After that, i sanded it to the perfect size, and rounded the corners. I still need to finish the corners though.
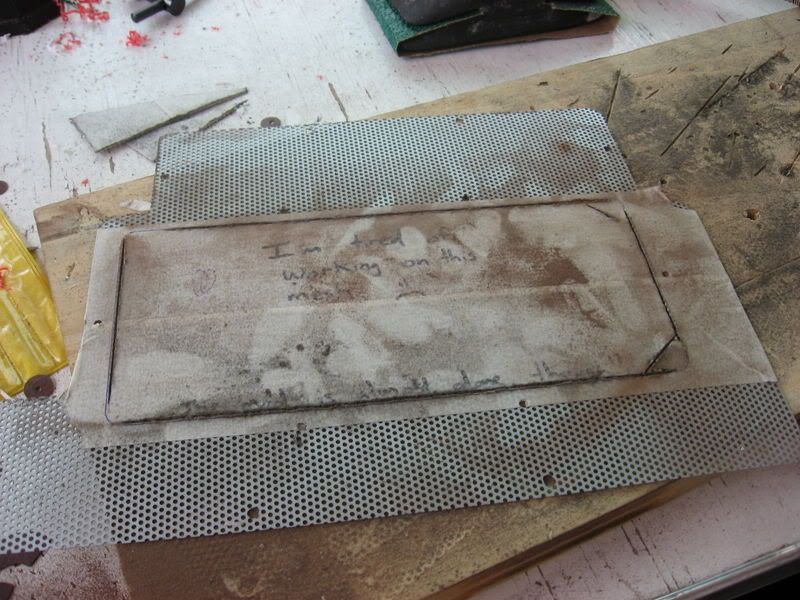
Then i needed to make the holes in the plexi frame that will hold the frame, mesh, side panel, and window together. I was scared of doing this, because the mounting screws will be 3mm, and the plexi frame is only 10mm wide. This leaves a HUGE possibility of cracking the plexi. So i needed to mask up the frame, PERFECTLY, so that i could make the markings in the center, PERFECTLY in the center. Masking up this thing was a tedious and time consuming process.... Masking...

Masking...
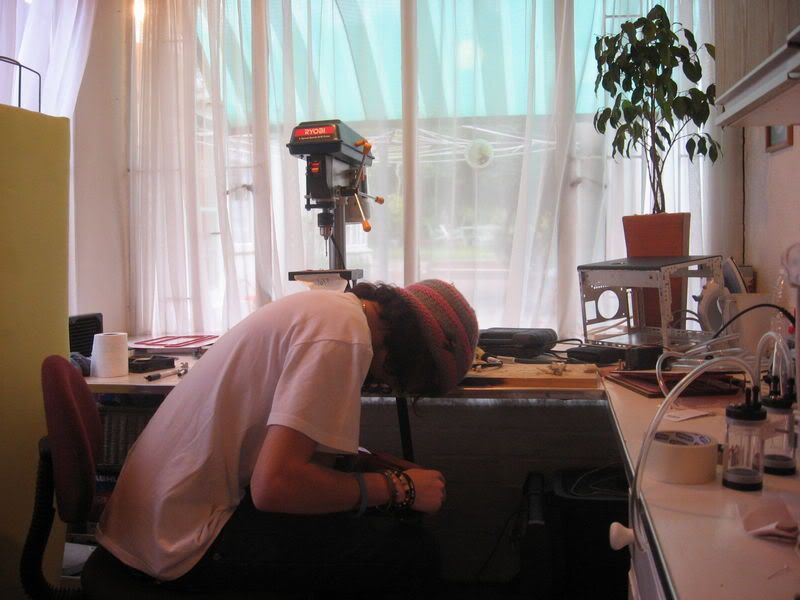
Masking...
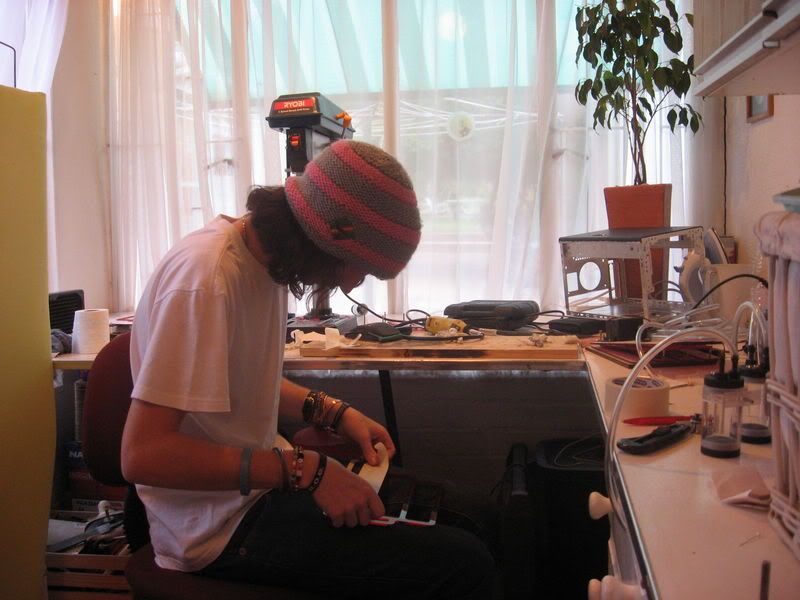
Please... no more...
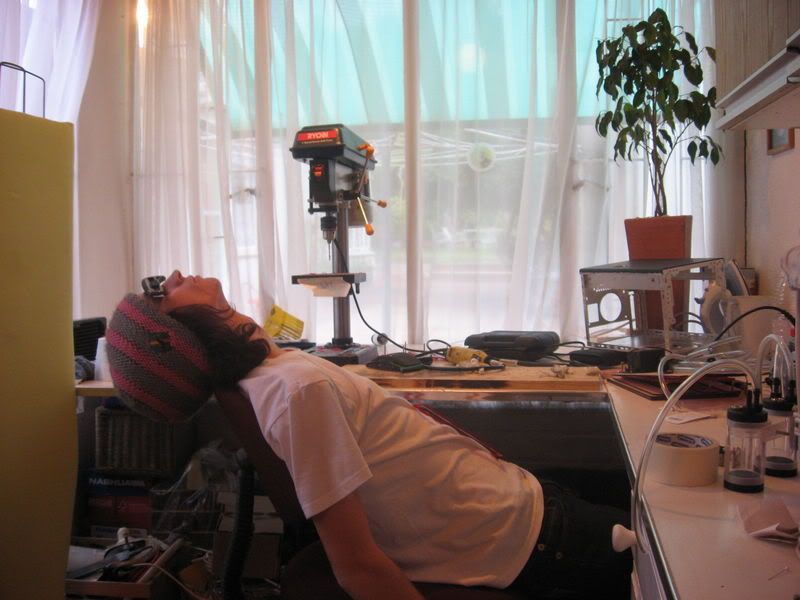
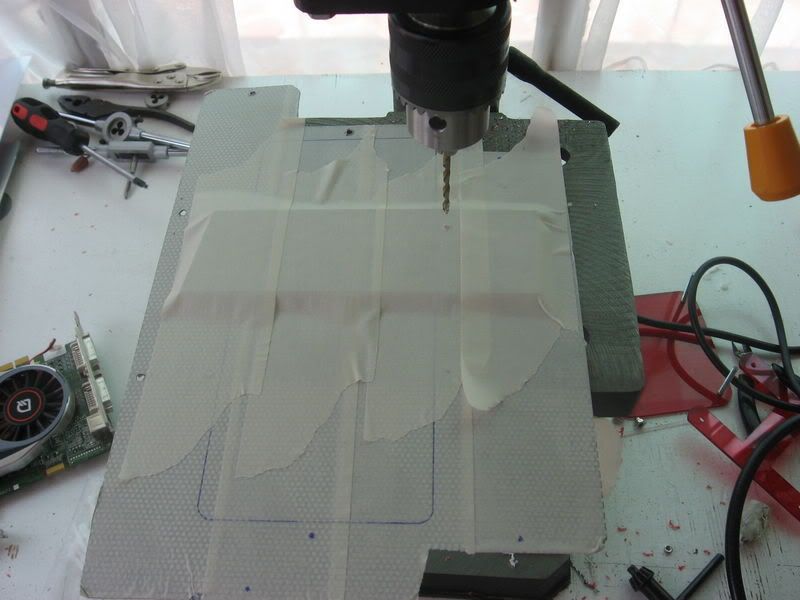
(please excuse that mess. That's actually a room for all sorts of other crap, and since my modding room is overflowing with other stuff, i have to mod here )
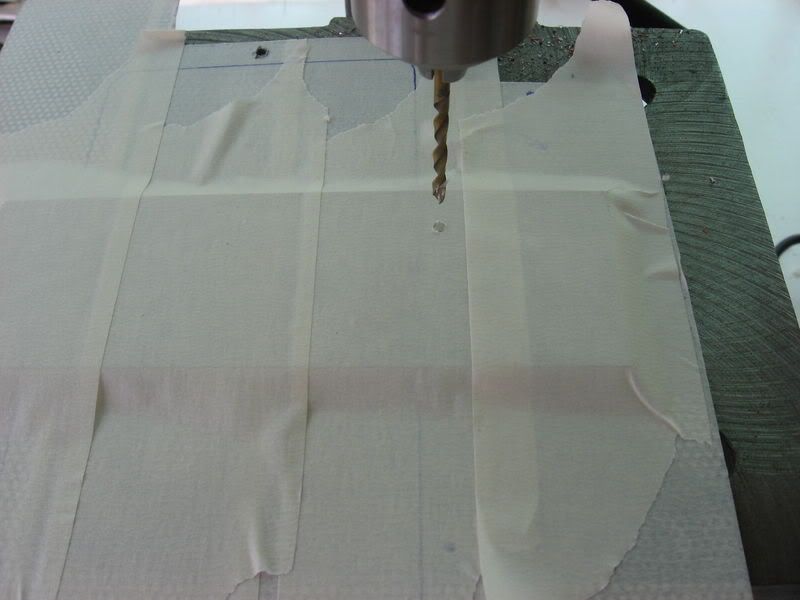
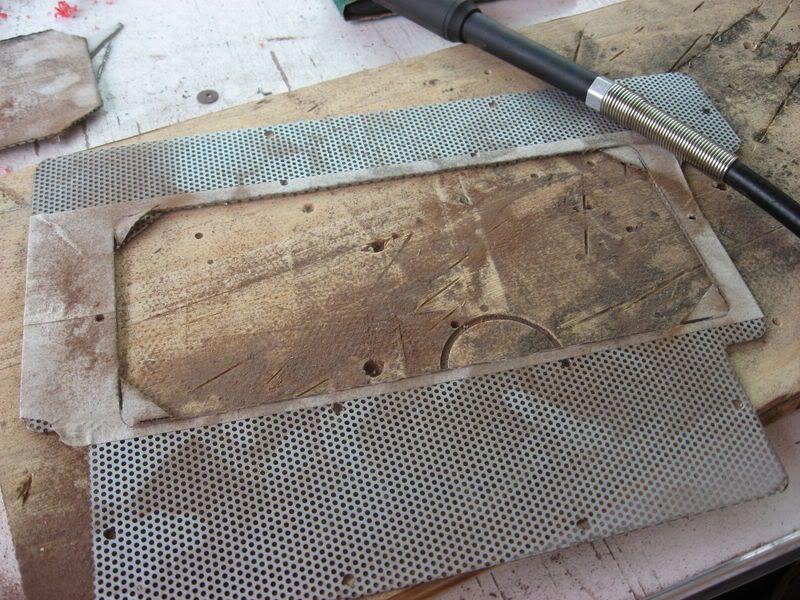
I eventually got it done and marked the holes:
And drilled them:
No cracks
Anyway, that's it for now. I'm busy making these same holes in the mesh. It's such a crap job... you have NO idea. Each hole takes at least 5 minutes of drilling/filing.
Not too long nowVampyre_2099 wrote:Quickly finish, I wanna see the end product
If you look REALLY closely, the plexi brackets i made are what's different. The distance from the start of the meter to the bend in the plexi is the difference. It's about 4mm closerDarkRanger wrote:As for the flow meters: Difference??? I don't see no difference....
Update time.
I wasn't planning on posting an update, but i'm bored and at home, so instead of playing Forza 2 for another few hours or watching this David Gilmour DVD again, i thought i'd post an update.
Alright, here are my two 7600GTs that i'll be SLI-ing in this shuttle:
Yes yes, i know that their made by a different Vendor. Long story behind that that nobody cares about, but the point is that they'll work together, but i have to do some modding first! See, when i first got this shuttle, i had my two 7800GTs in here:
I had to mod their coolers though, but luckily i wont need to mod any coolers, because the coolers are coming off. So here's what i did. I measured up two identical pieces of plexi that will act as mounting hardware:
Drilled the holes FIRST (only learned this little tip a few weeks ago):
After cutting them out, i tapped the 4mm holes in the middle with a 5mm thread:
And here is the setup of the two cards. Reminds me SO much of the 7950GX2:
Obviously it will look a million times better when i'm finished. I still need to make appropriately long 3mm rods, polish the plexi, and also get a nice 5mm dome nut for the Legend card's mounting.
I also did some more tubing work:
Ignore the slight kink between the chipset and first video card, that will be sorted out
Then i started some more work on the mesh. Ahh man i hate working on this mesh... Cut out:
After that, i sanded it to the perfect size, and rounded the corners. I still need to finish the corners though.
Then i needed to make the holes in the plexi frame that will hold the frame, mesh, side panel, and window together. I was scared of doing this, because the mounting screws will be 3mm, and the plexi frame is only 10mm wide. This leaves a HUGE possibility of cracking the plexi. So i needed to mask up the frame, PERFECTLY, so that i could make the markings in the center, PERFECTLY in the center. Masking up this thing was a tedious and time consuming process.... Masking...
Masking...
Masking...
Please... no more...
(please excuse that mess. That's actually a room for all sorts of other crap, and since my modding room is overflowing with other stuff, i have to mod here
I eventually got it done and marked the holes:
And drilled them:
No cracks
Anyway, that's it for now. I'm busy making these same holes in the mesh. It's such a crap job... you have NO idea. Each hole takes at least 5 minutes of drilling/filing.
That guy that used to mod cases. Now I take photos. True story.

-
fiber-optics
- Registered User
- Posts: 5393
- Joined: 01 Apr 2007, 02:00
-
Lithe_Joint
- Registered User
- Posts: 802
- Joined: 06 Sep 2006, 02:00
- Location: WTF?
- Contact:
-
DAE_JA_VOO
- Registered User
- Posts: 12310
- Joined: 28 Nov 2005, 02:00
- Location: That other place
- Contact:
Samaya wrote:Nice drill work on that cover piece. Those press drills are the best, I can't mod without mine.
Yeah dude. I can't imagine modding without mine. It's SUCH a great tool
Samaya wrote:Are you going away for the holiday?
Yeah but only for about a week. I'm leaving on the 16th and coming back on the 23rd. Why do you ask?
That guy that used to mod cases. Now I take photos. True story.
I am home the whole holiday, was wondering if you still needed help testing epiphany's insides. And... um... I also want to come see EndorphinDAE_JA_VOO wrote:Samaya wrote:Are you going away for the holiday?
Yeah but only for about a week. I'm leaving on the 16th and coming back on the 23rd. Why do you ask?
-
DAE_JA_VOO
- Registered User
- Posts: 12310
- Joined: 28 Nov 2005, 02:00
- Location: That other place
- Contact:
An entire update and the only thing you saw was the free pen?I34z1k wrote:Free pens ftw
Ooh ooh ooh!! We must definitely make a plan!Samaya wrote:I am home the whole holiday, was wondering if you still needed help testing epiphany's insides. And... um... I also want to come see Endorphin
Update time!
I'm SO excited to get this update up.
One thing, before i update.... i HATE mesh.... i hate it. It looks so, so good, but working with it is terrible...
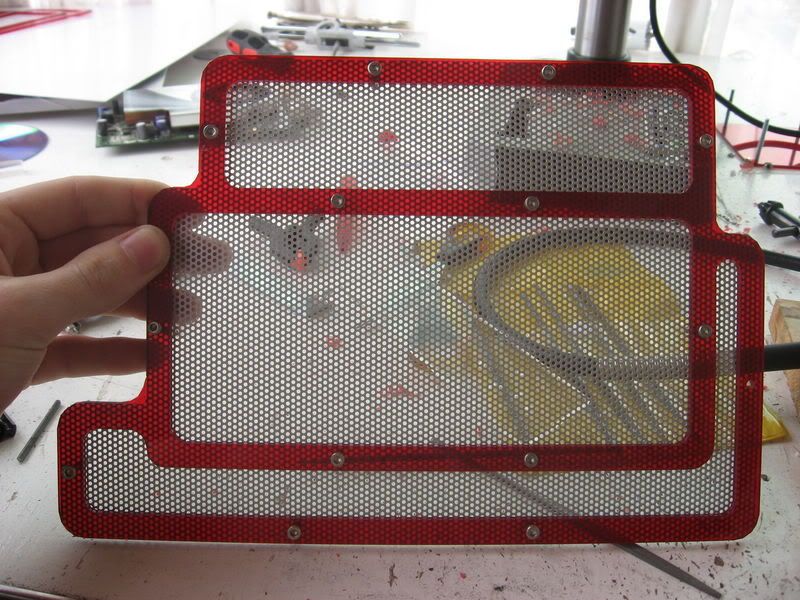
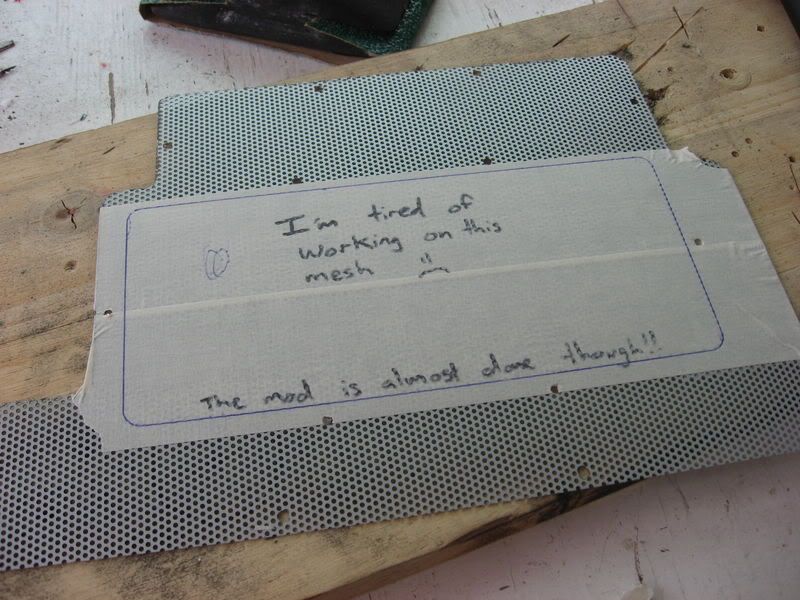
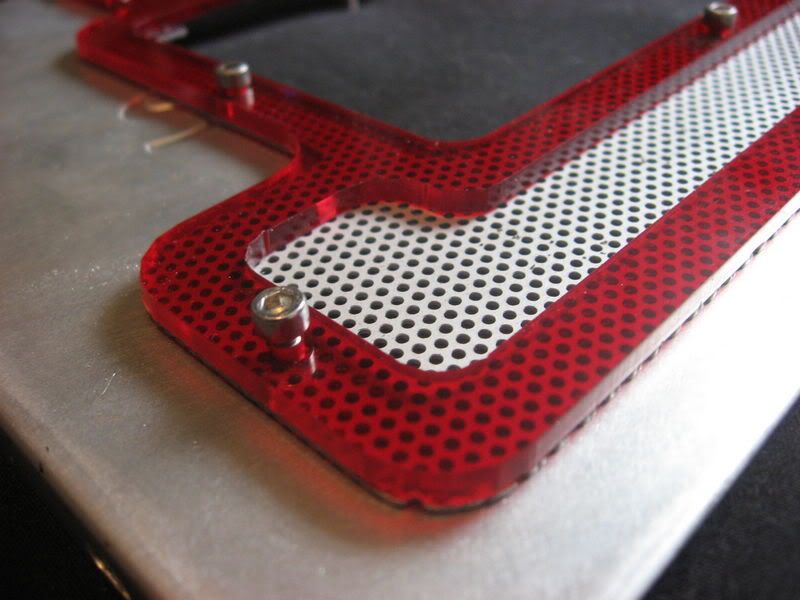
ANYWAY. As i said in the last update, i needed to make all the mounting holes in the mesh. My initial method ended up costing me about 10 minutes per hole (there are 14 holes, so that's over 2 hours, just to make a few holes). I eventually thought about using plexi as a guide, and that worked perfectly:
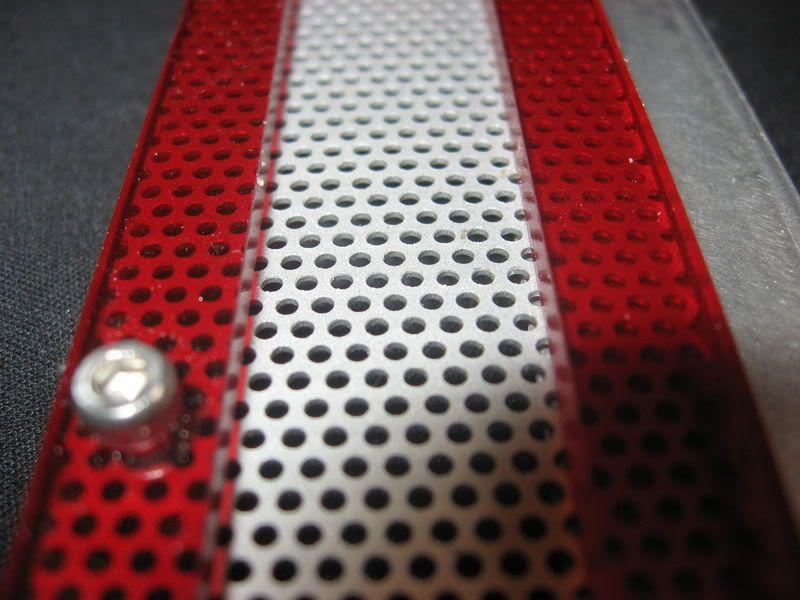
After some more sanding and filing, it looks like the mesh is almost done:
Now i just have to cut a big hole into it. lol.
Half way:
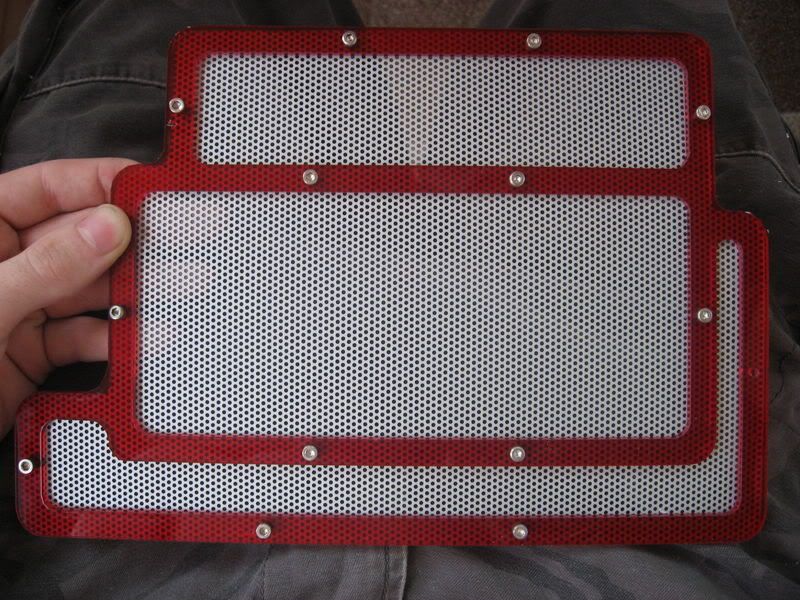
OMW... how sexy is this:
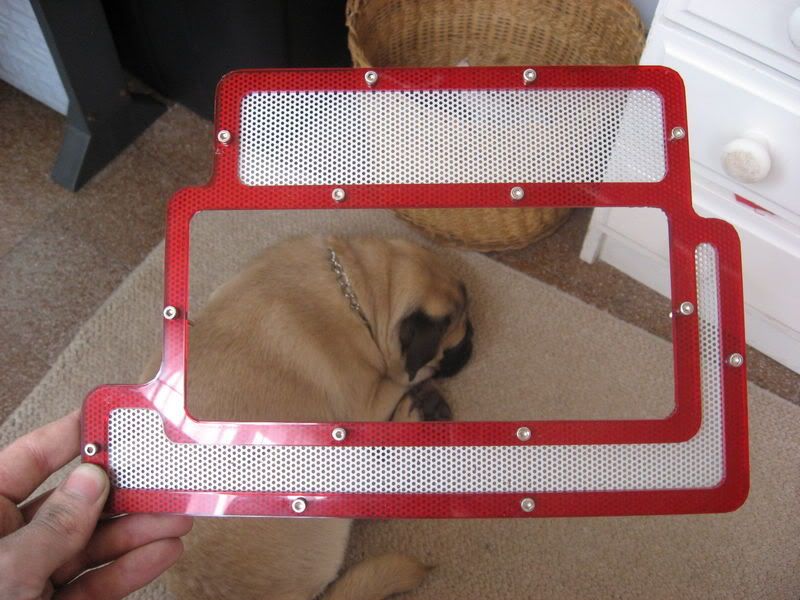
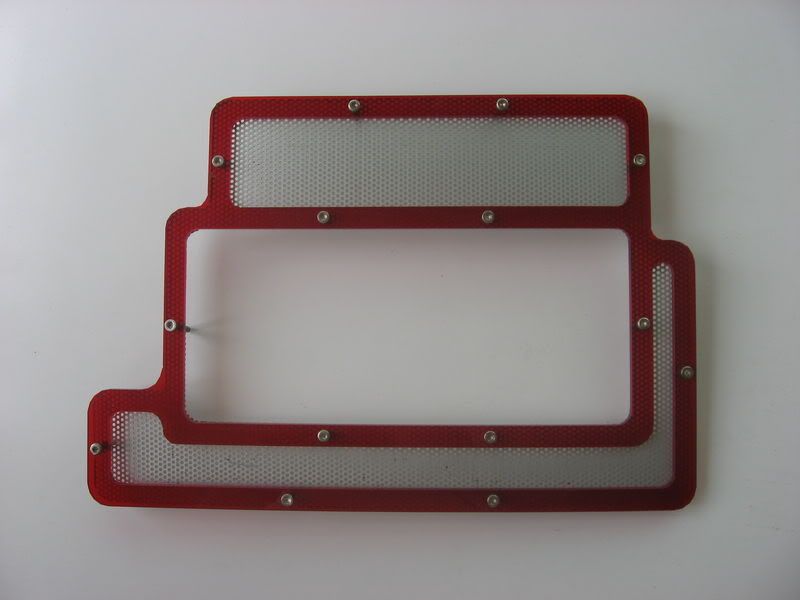
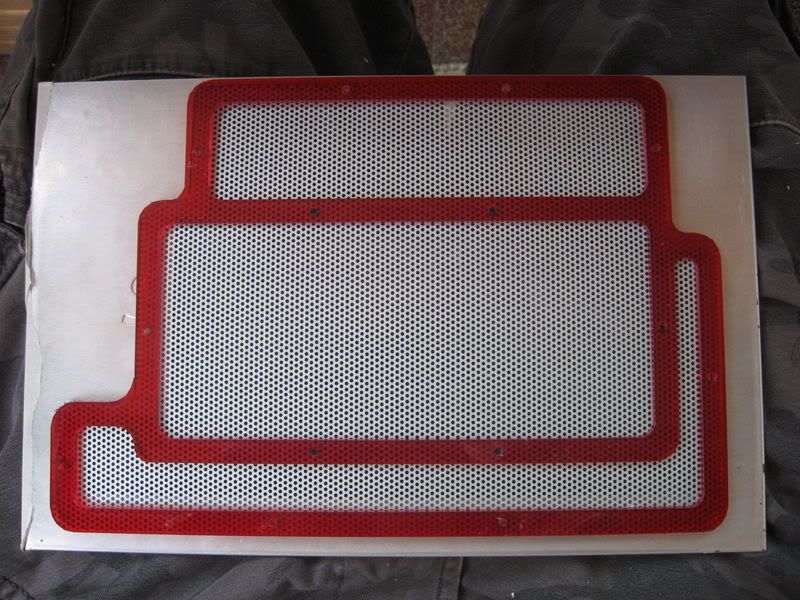
All it needed now was a window:
All done:

Not too bad for my first side panel mod ever hey? I'm very happy with the result, i think it looks absolutely fantastic. All the panel still needs is a couple of layers of paint
By the way, looks like i'm destroying photobucket this month. lol. I've used almost 30GBs of bandwidth since the 12th of November
That guy that used to mod cases. Now I take photos. True story.

-
hiphopbunny
- Registered User
- Posts: 471
- Joined: 16 Sep 2005, 02:00
- Location: ...here...
-
DAE_JA_VOO
- Registered User
- Posts: 12310
- Joined: 28 Nov 2005, 02:00
- Location: That other place
- Contact:
Thanks for the comments everyone
Paint the case
Anodize the chassis
PSU work (sleeving (bleh), painting, etc)
One or two things here and there
Hmmm....silv3rback wrote:What you still gotta do to complete though?
Paint the case
Anodize the chassis
PSU work (sleeving (bleh), painting, etc)
One or two things here and there
Been wondering about that too. Since the panel will be black, the S shouldn't bee too visible, but if it is, i'll bondo it closed and repaint the panel.DeanMF wrote:What about the S on the left? How will you be removing it? Or covering it?
That guy that used to mod cases. Now I take photos. True story.