Project : Infinity CM Stacker (Reservoir In Case)
-
- Registered User
- Posts: 1321
- Joined: 04 Nov 2007, 02:00
- Location: /home/jhb/fourways
Erm, how about the last 2 or so pages?
Heck , even on the last previous page there was made reference to the radiator fitting...
My BF2142 Stats:
Slasher : Former member of www.PCFormat.co.za
I have reached the end of my near 5 year forum life. Farewell good days...
slasher (at) webmail (dot) co (dot) za
Slasher : Former member of www.PCFormat.co.za
I have reached the end of my near 5 year forum life. Farewell good days...
slasher (at) webmail (dot) co (dot) za
-
- Registered User
- Posts: 2478
- Joined: 02 Aug 2006, 02:00
- Location: Durban, Bluff, Here by the ocean
- Contact:
One lil update, Gfx card cover made.....
So i Started cutting this piece , and then i was like oh crap, need to take pics... so this is a bit more involved pic.
Bit more cutting, moving the piece around to avoid the jigsaw from jerking the cover. Just and overlay of the planning cover to show you my cutting.
After about another 10mins i had finished filing the cover and just to show you, if you look on the planning cardboard piece you can see dotted lines, those are the bends. On the aluminum cover ive got solid lines.
Before i started bending the cover, i cut the strip off the back of it. you can see a solid line running on the picture above, and on this one ive cutting it to a certain point. Thats where i wil drill two holes for allen bolts and dome nuts to be placed, to hold it steady.
Let start some bending.... Using my very little muscle power i started bending the on side.
After using a piece of wood and a hammer ive got it to this point, nicely bent to a 90 degree angle.
Finished bend....
Same process on the next bend....Using my hands and the piece of wood and a hammer to get it nicely bent to a 90 degree angle.
And there it is, complete...
I just wanted to see how it fitted in the case , gonna need some cutting adjustments, needs to be lowered so it meets with the other cover piece and then bolted flush against the other one.
Thats all for now....
Im gonna do the same thing i did with the main motherboard cover, with those strip designed cutts on top raise off the covers...
DoOb's
-
- Registered User
- Posts: 2478
- Joined: 02 Aug 2006, 02:00
- Location: Durban, Bluff, Here by the ocean
- Contact:
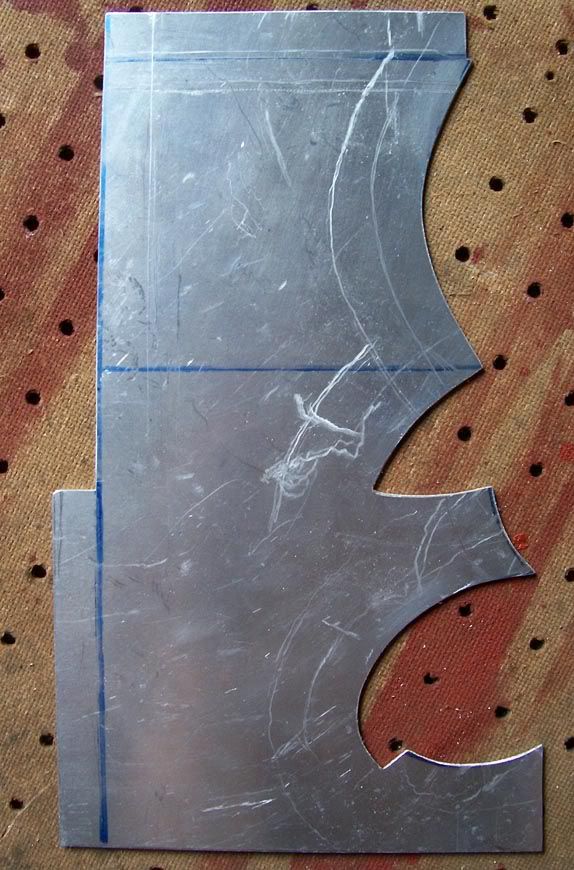
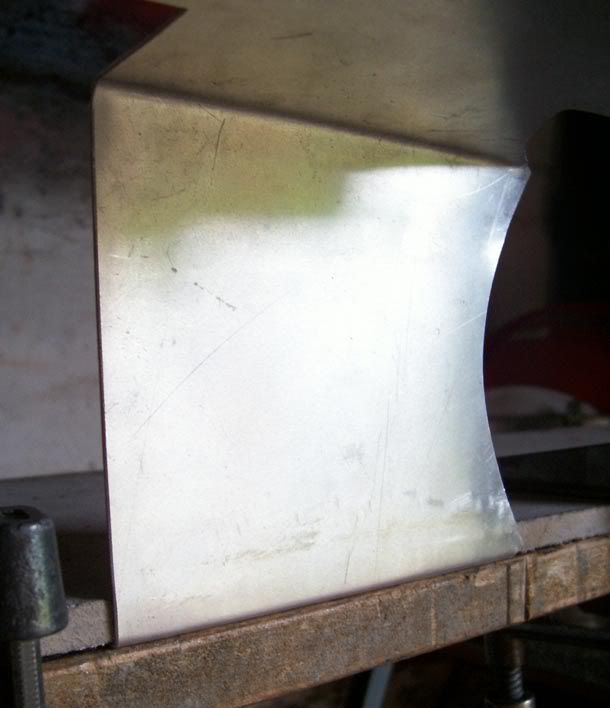
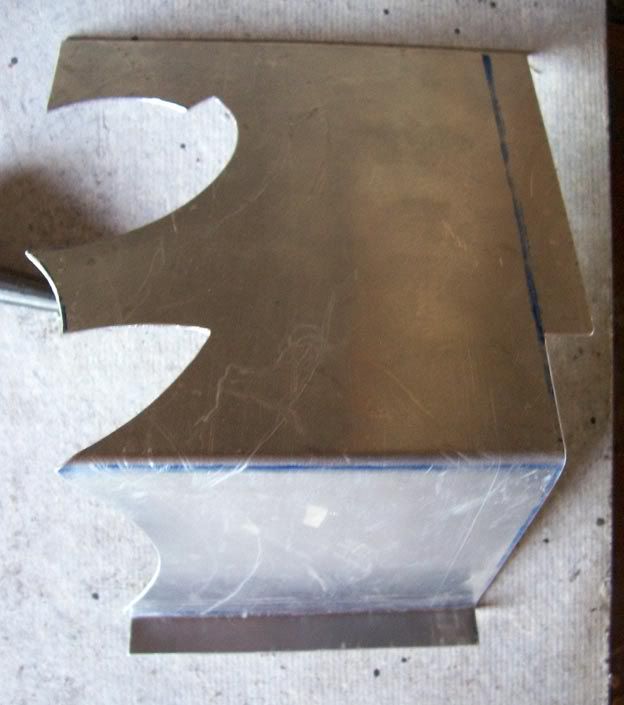
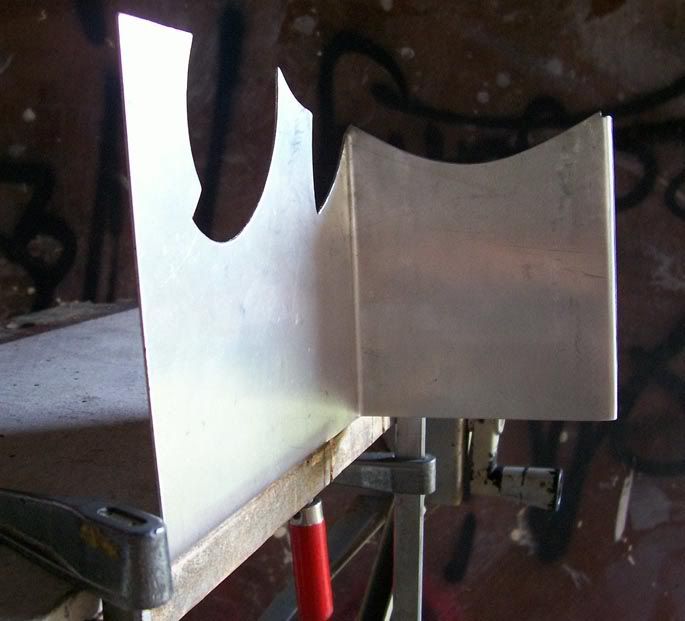
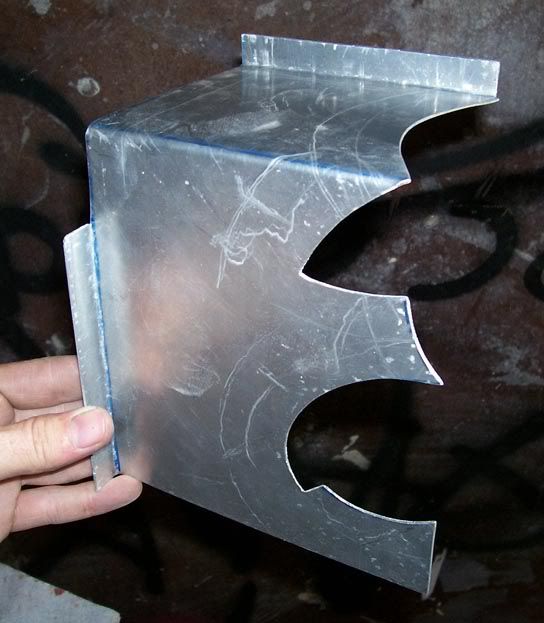
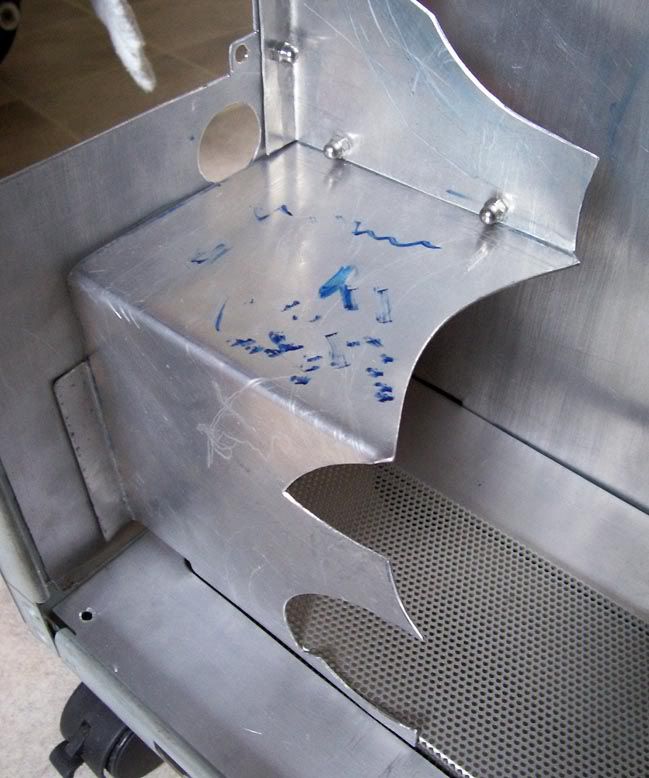
You not gonna see them thats the cool thing, the one where it meets the other cover, thats actually going behind that cover. so it will almost look like its a solid piece, Oh ya and the other one you wont see unless you bent your head right next to the side panel to see itSkidd wrote:Looking good doobs I would have maybe bent those mounting points the otherway around so that you dont see them when the cover is mounted.
Last edited by DoOb on 15 Nov 2007, 12:42, edited 1 time in total.
Looks good but I agree with Skidd. I suppose its too late now. If you bend it the other way the metal is going to bend wrong or break.I suppose you can just hide those bits. <- ah,Skidd wrote:I would have maybe bent those mounting points the otherway around so that you dont see them when the cover is mounted.
But it does look good
-
- Registered User
- Posts: 8346
- Joined: 10 May 2006, 02:00
- Processor: Intel i5-3750
- Motherboard: Gigabyte
- Graphics card: nVidia GTX 550Ti
- Memory: 8GB Jetram
- Contact:
-
- Registered User
- Posts: 1321
- Joined: 04 Nov 2007, 02:00
- Location: /home/jhb/fourways
-
- Registered User
- Posts: 2478
- Joined: 02 Aug 2006, 02:00
- Location: Durban, Bluff, Here by the ocean
- Contact:
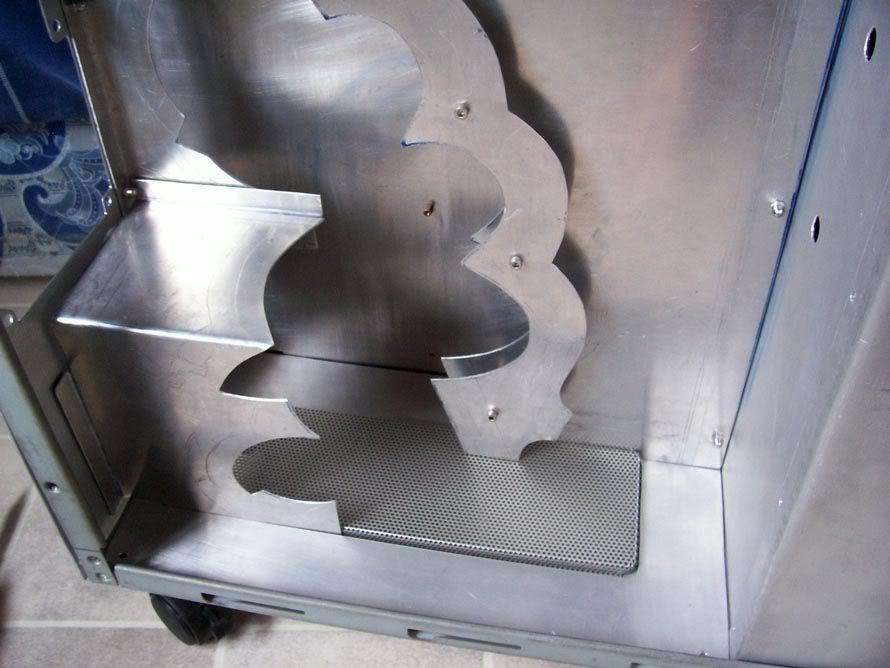
Not exaclty bro, this is how it suppose to look....psYChowIt wrote:That completes the hole cover. NIcely DoNe!
Just need to make to more holes for the other flap, and secure it with Allen bolts and dome nuts. Next is to detail that cover with an overlay piece of shaped aluminum. You'll see what i mean.
DoOb's
Last edited by DoOb on 15 Nov 2007, 14:59, edited 2 times in total.
nice work dude or shud a i say doobs
Last edited by bootsie on 15 Nov 2007, 22:00, edited 1 time in total.
Toshiba A-100 Satellite Pro - C2D - 2 GHZ - ATI Radeon Mobility X1600 256 MB - 1 gig Ram - Harmon Kardon Sound